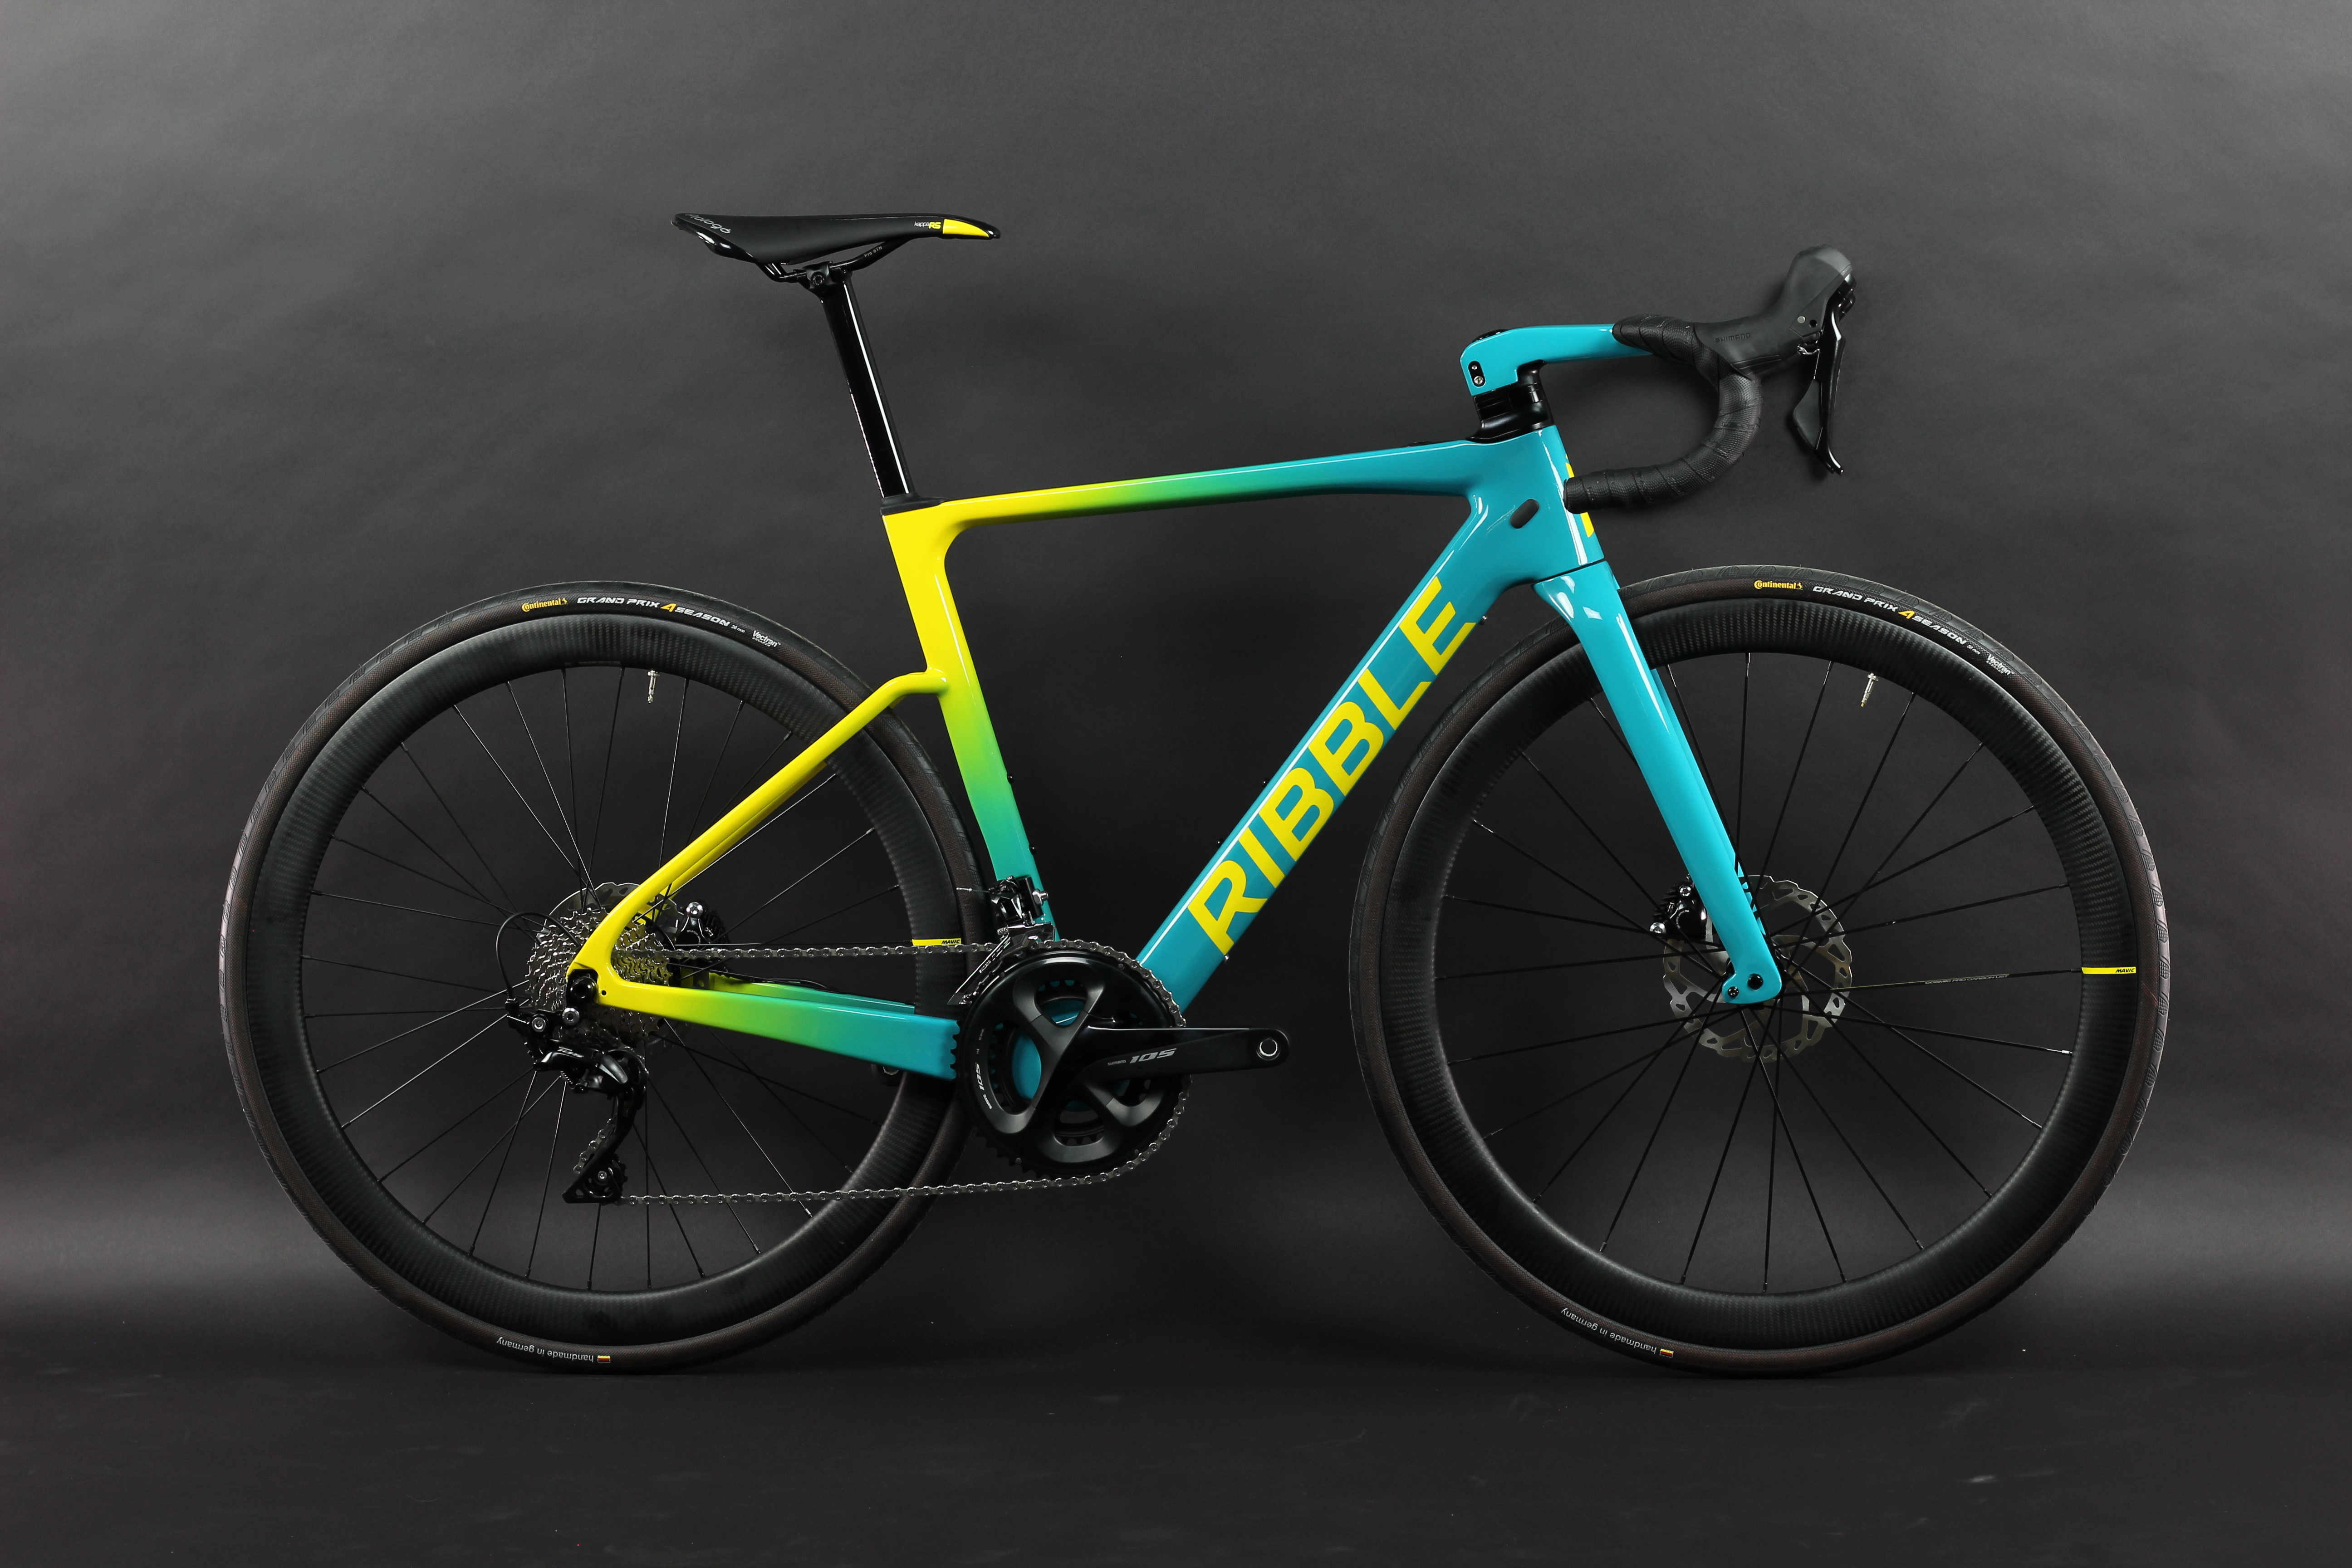
Have you seen one of our bikes and contemplated buying it but have been apprehensive about how the order process works, or how the bike arrives? We would like to set your mind at rest and assure you that when you order from Ribble, you not only receive a fantastic bike but also the excellent customer care that we offer too! In this blog we outline how the order process works and what assembly is required when receiving your new Ribble bike.
Who are Ribble?
Ribble Cycles were established in 1897 and have been producing handbuilt bikes for 122 years! Each bike is built by hand to the customers preferred specification, resulting in you receiving the perfect bike for you. For 2019 we embarked upon an expansion of our range and as a consequence we now offer everything from market leading electric bikes to hardtail mountain bikes and everything in between.
How does the order process work?
There are 2 ways of ordering bikes through our website. You can select one of the recommended specification builds and add it to your basket without changing any of the parts. However, what Ribble has always been renowned for is offering you the option to customise a bike to suit your requirements. Within the BikeBuilder function, you have the option to change literally everything but the frame and forks.
The first step in placing an order is to select your frame size. Each size has an accurate height guide which has been calculated by our bike experts. When you select a specific size the date that you can expect to receive the bike will be displayed. Once you have placed the order the following will occur;
- As soon as you place the order you will receive a confirmation email which lists a detailed summary of the parts that have been selected. This also confirms the delivery details that you have provided. (we strongly advise you to check the order details thoroughly and contact us ASAP if any details are incorrect).
- You will receive regular communications from our team with details of the progress of your order.
- Your bike is hand-assembled in our workshop by one of our team of highly experienced mechanics.
- After the build is completed the bike is then handed over to a member of the workshop team whose sole task is to perform a PDI (Pre-Delivery Inspection) check. During this inspection, we perform a comprehensive multi-point check to ensure that everything works correctly and the bike is safe to ride when you receive it.
- The bike is then partially disassembled before being carefully packaged into a box and handed over to the carrier. At this point, we assign the bike a tracking number and this is emailed across to you to enable you to be able to track the parcel to your door. (it's important to note that this tracking number will only become 'live' when the parcel arrives at the first tracking point).
- If you have a preferred delivery date we can work with you to facilitate the bike being delivered when it is more convenient for you.
Tools you would need to unpack a new Ribble
For unpacking and proper assembly we recommend the following tools be used;
- Sharp scissors
- A set of allen keys to include 2/4/5 and 6mm allen keys
- Pedal spanner (if the pedals do not take a 6 or 8mm allen key)
- Bicycle Pump
- Teflon Grease
- Torque Wrench
How the bike arrives
Below is a breakdown of the steps required to get your bike ready to ride when you receive it in the post.
1. Remove the packaging

The above image indicates how the bike looks when removed from the shipping box. Note that the front wheel and handlebars have been removed for shipping.
Remove the bike from the cardboard box and using sharp scissors carefully remove all of the packaging. Warning: we advise that you should not use a knife as you may damage the paintwork.
2. Fit the front wheel
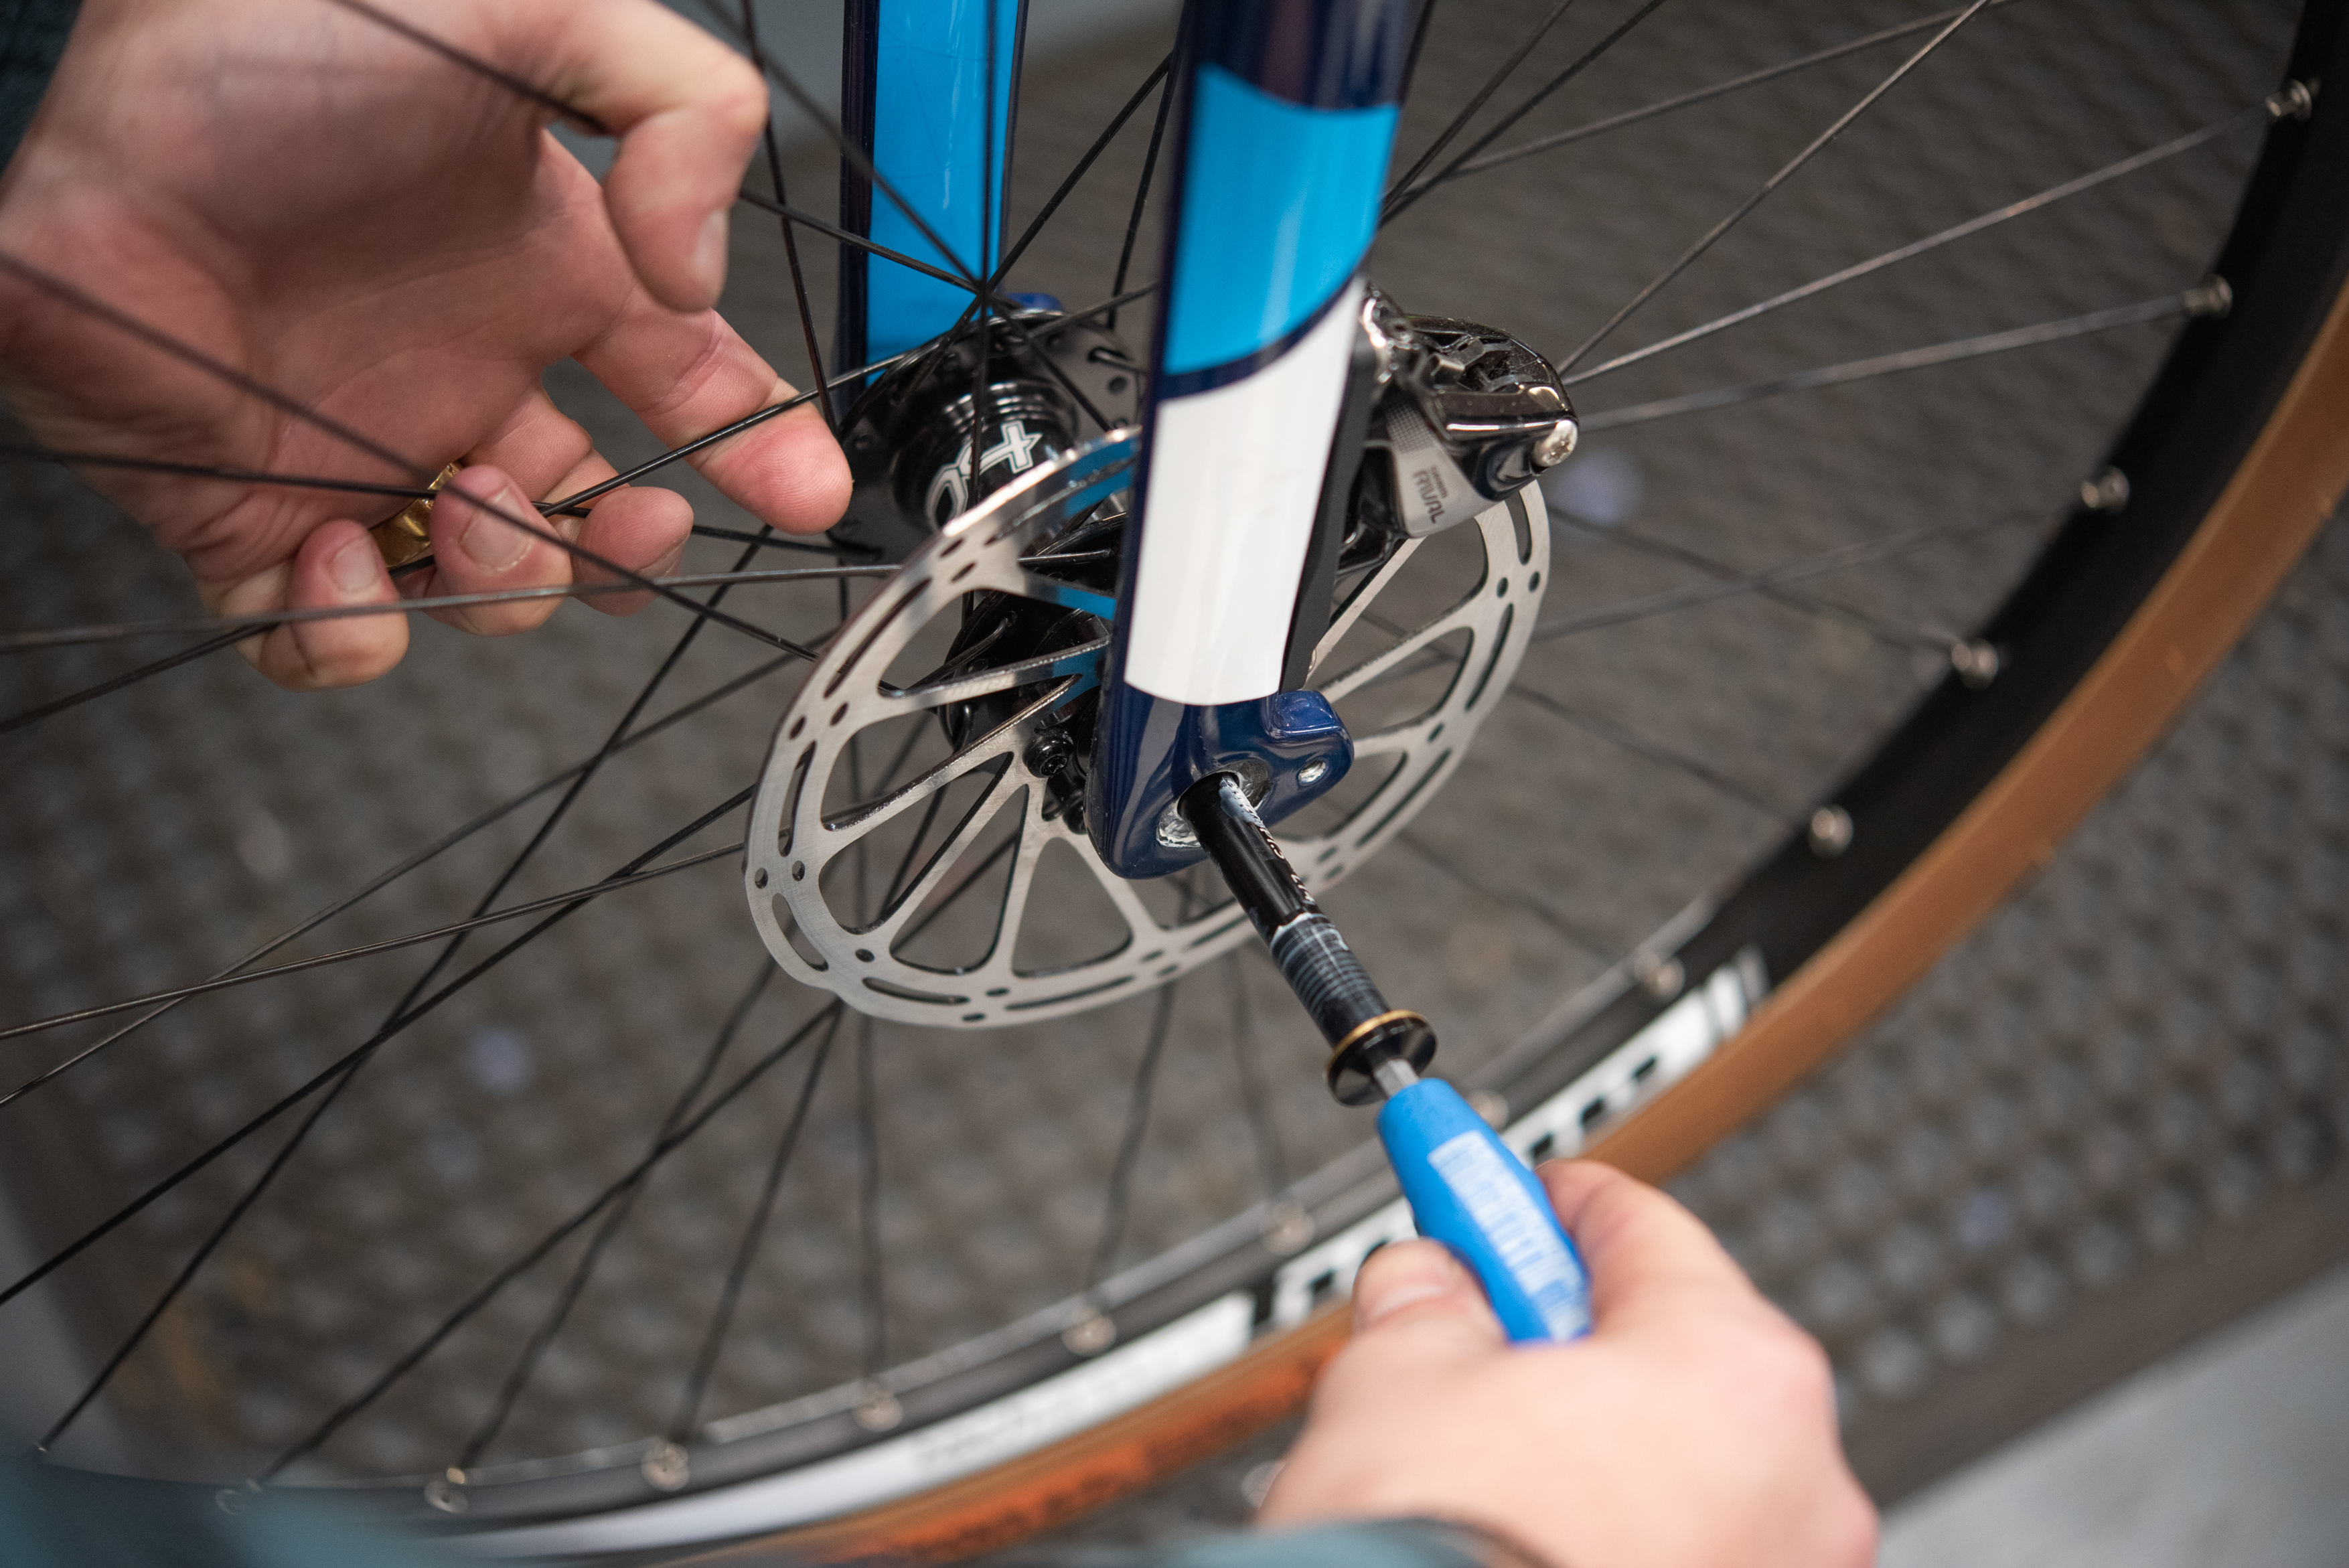
Insert the thru axle from the disc rotor side of the bike
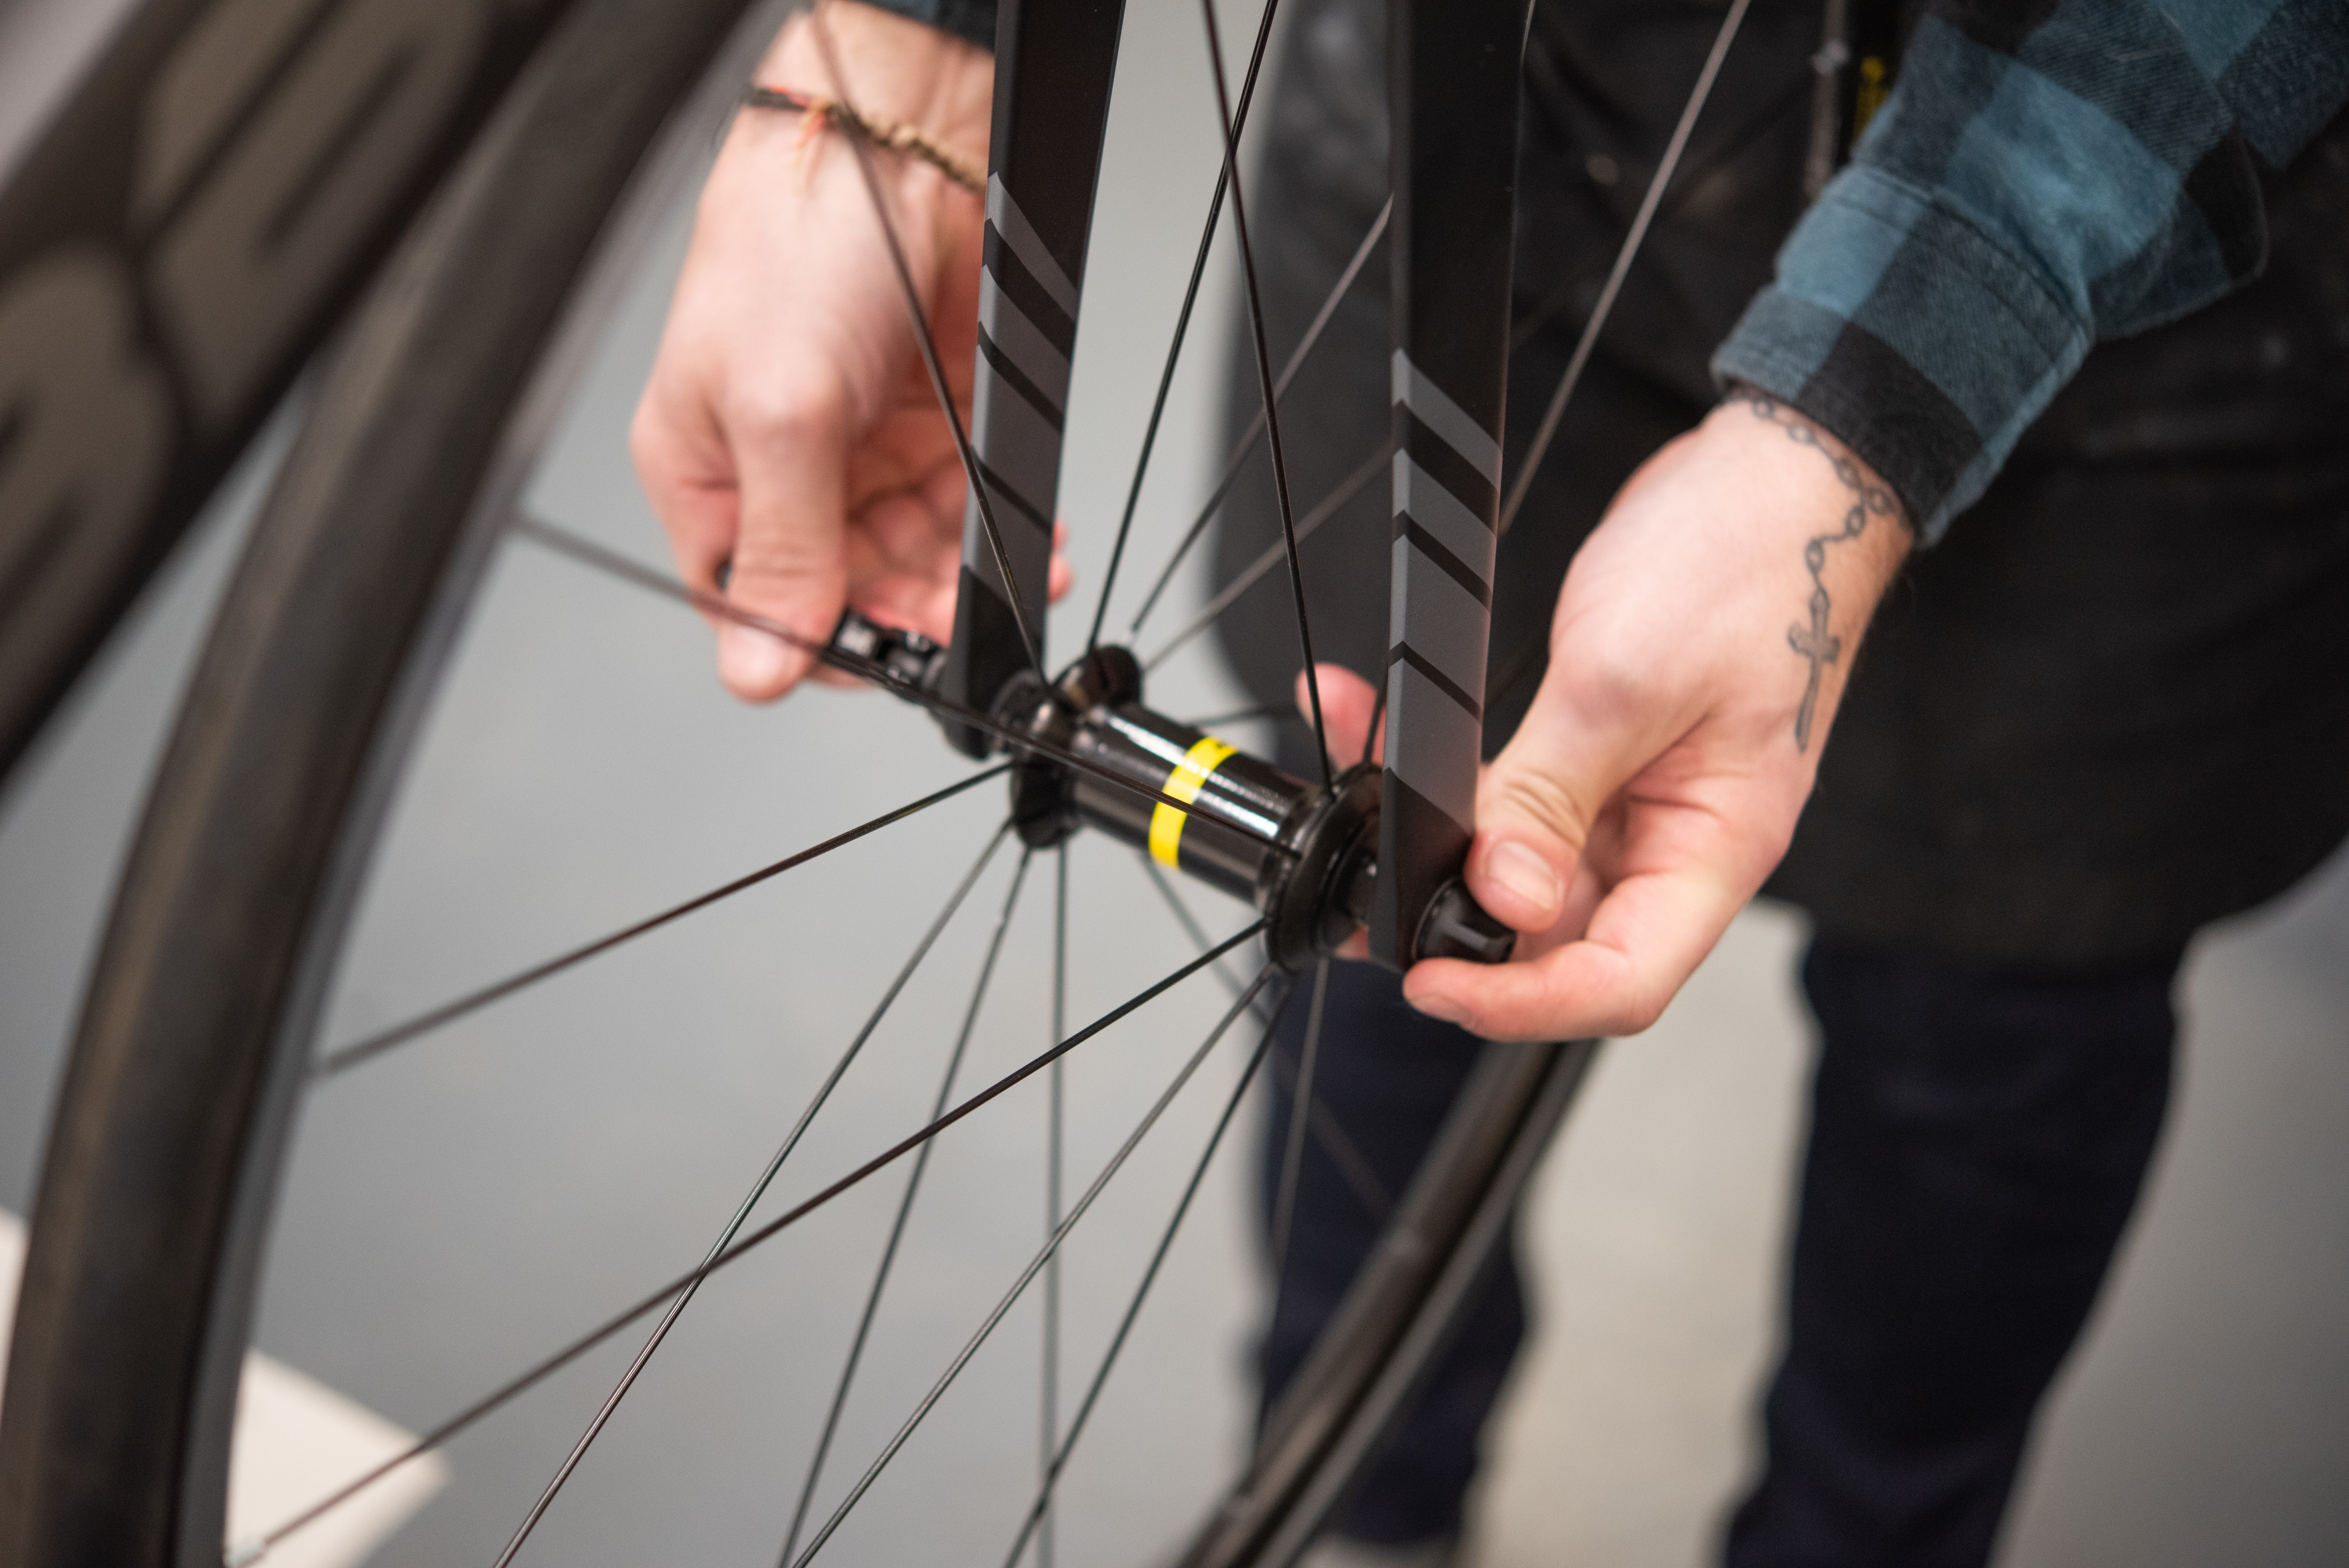
Tighten the skewer until you feel resistance when trying to close the lever
If you have ordered a disc bike then it will be supplied with a thru-axle system. The thru-axle itself should be packed with the seatpost/saddle and instructions. Slide the thru-axle into the fork dropout and wheel hub from the same side as the disc rotor.
Warning: Please ensure that the allen key is fully inserted into the head of the thru-axle before tightening. After approximately a couple of millimetres you may feel some initial resistance due to a small rubber O-Ring located within the axle. Apply a little extra pressure to push the allen key beyond this so that it sits approx 1-2mm within the head of the bolt. Then tighten clockwise to 10Nm using the 5 or 6mm allen key.
If you have a standard rim brake with a quick release lever, simply place the wheel within the fork drop outs and insert the skewer. Turn clockwise to tighten until you can press the lever closed with some resistance. If it's difficult (but possible) to close the lever with one hand then you have it just about right. Warning: Take care not to over-tighten as this may damage the forks.
3. Fit the handlebars
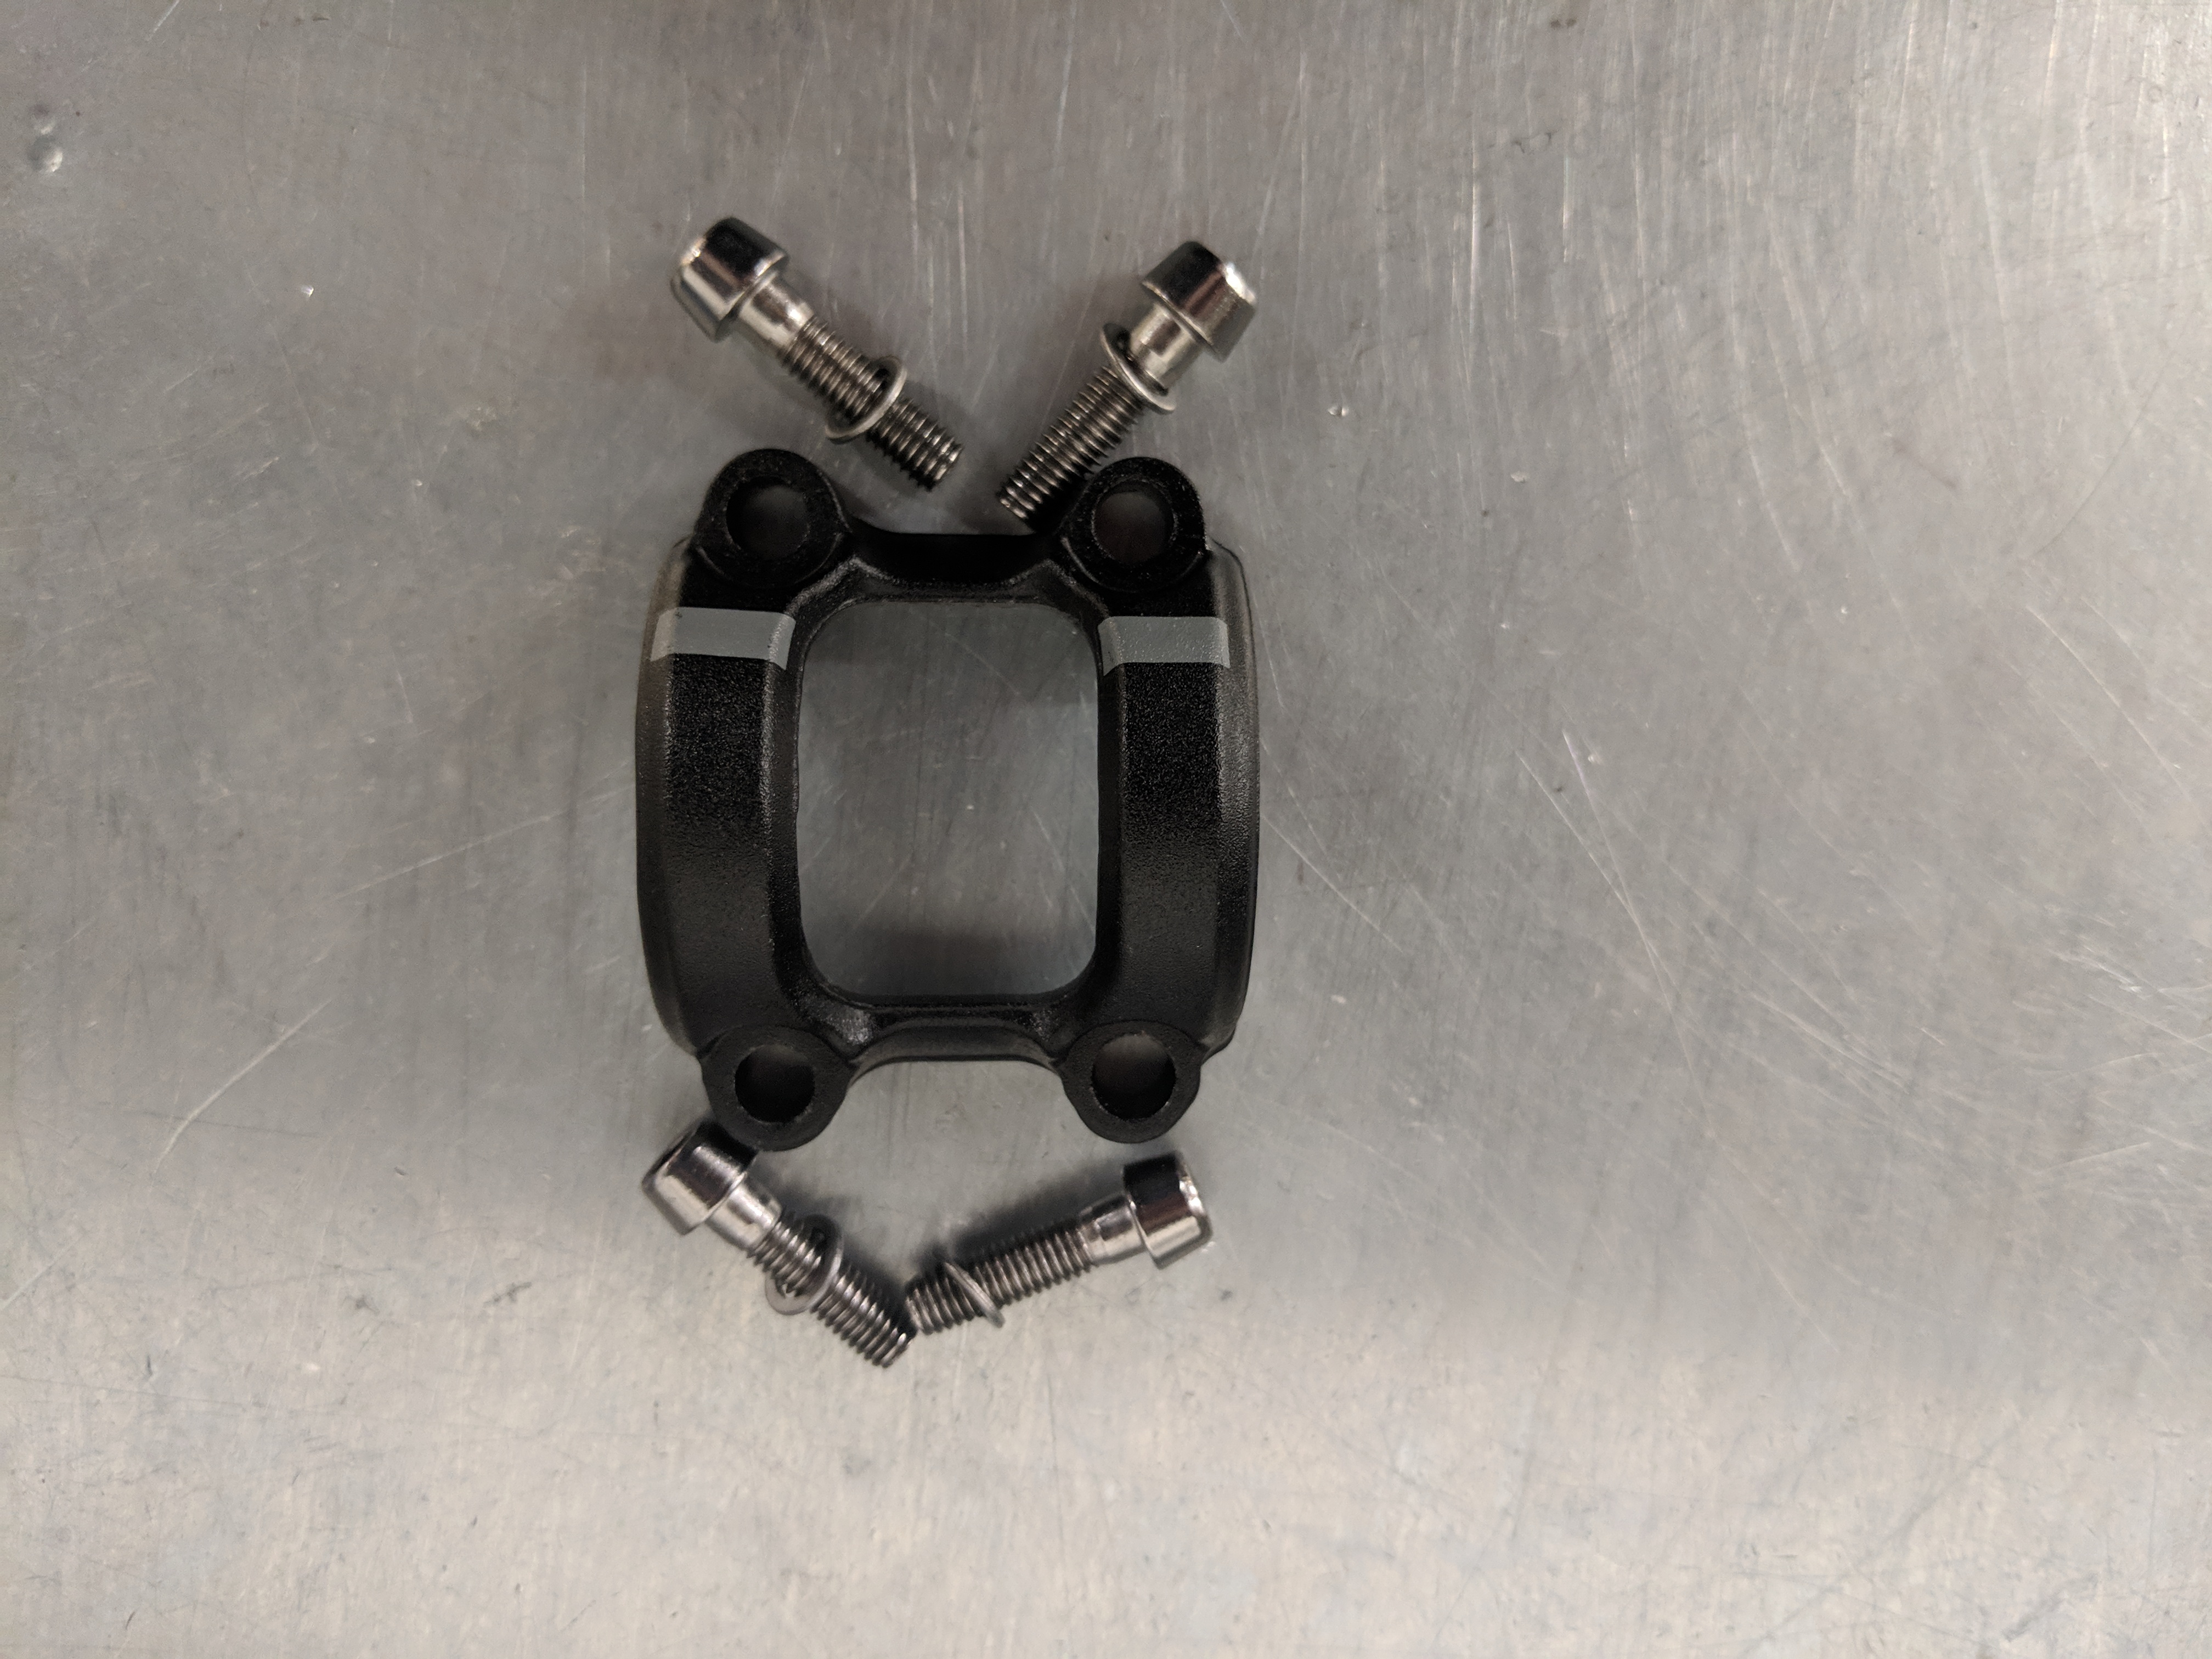
A stem faceplate with 4 x 4mm allen bolts
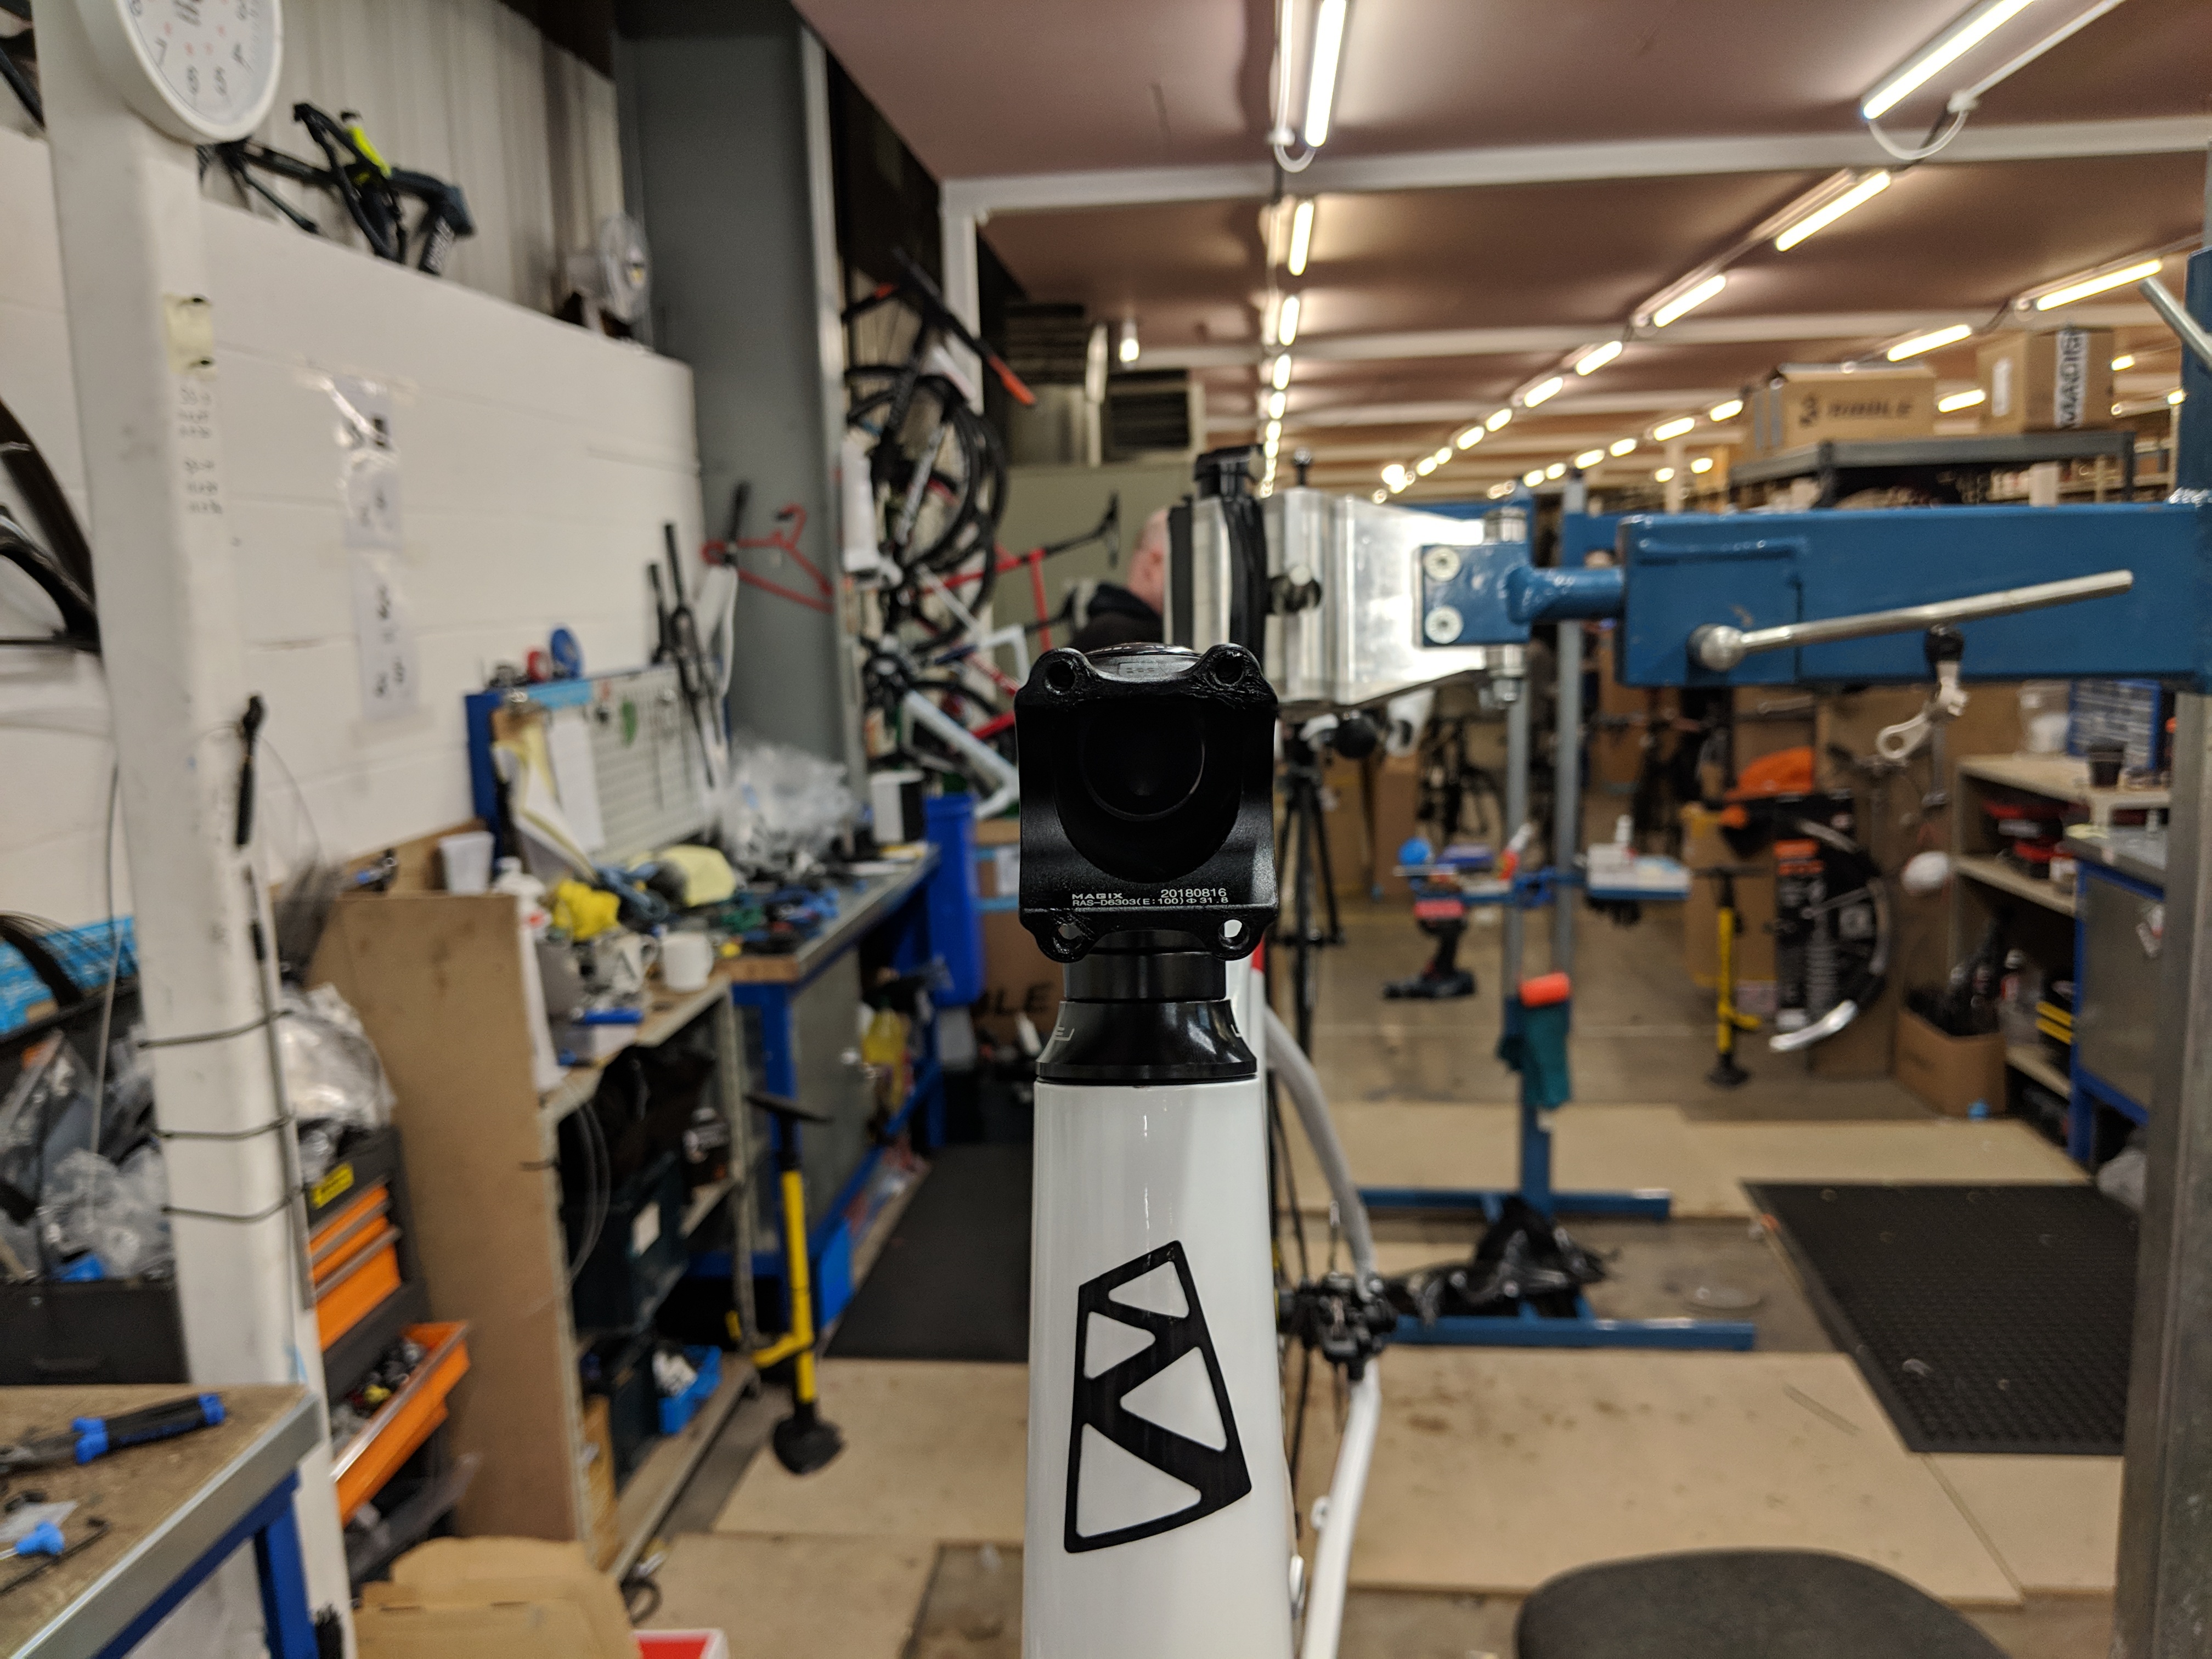
The faceplate attaches to the stem once the bars are in place
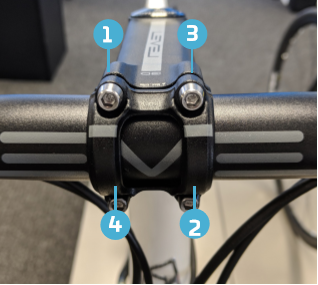
Tighten evenly in this order
Standard handlebars: Take the stem faceplate and 4 x 4mm allen key bolts and attach the handlebars to the stem. The bolts should be tightened evenly and diagonally. (See image 3 above). Tighten to the torque setting that is printed on the handlebar stem.
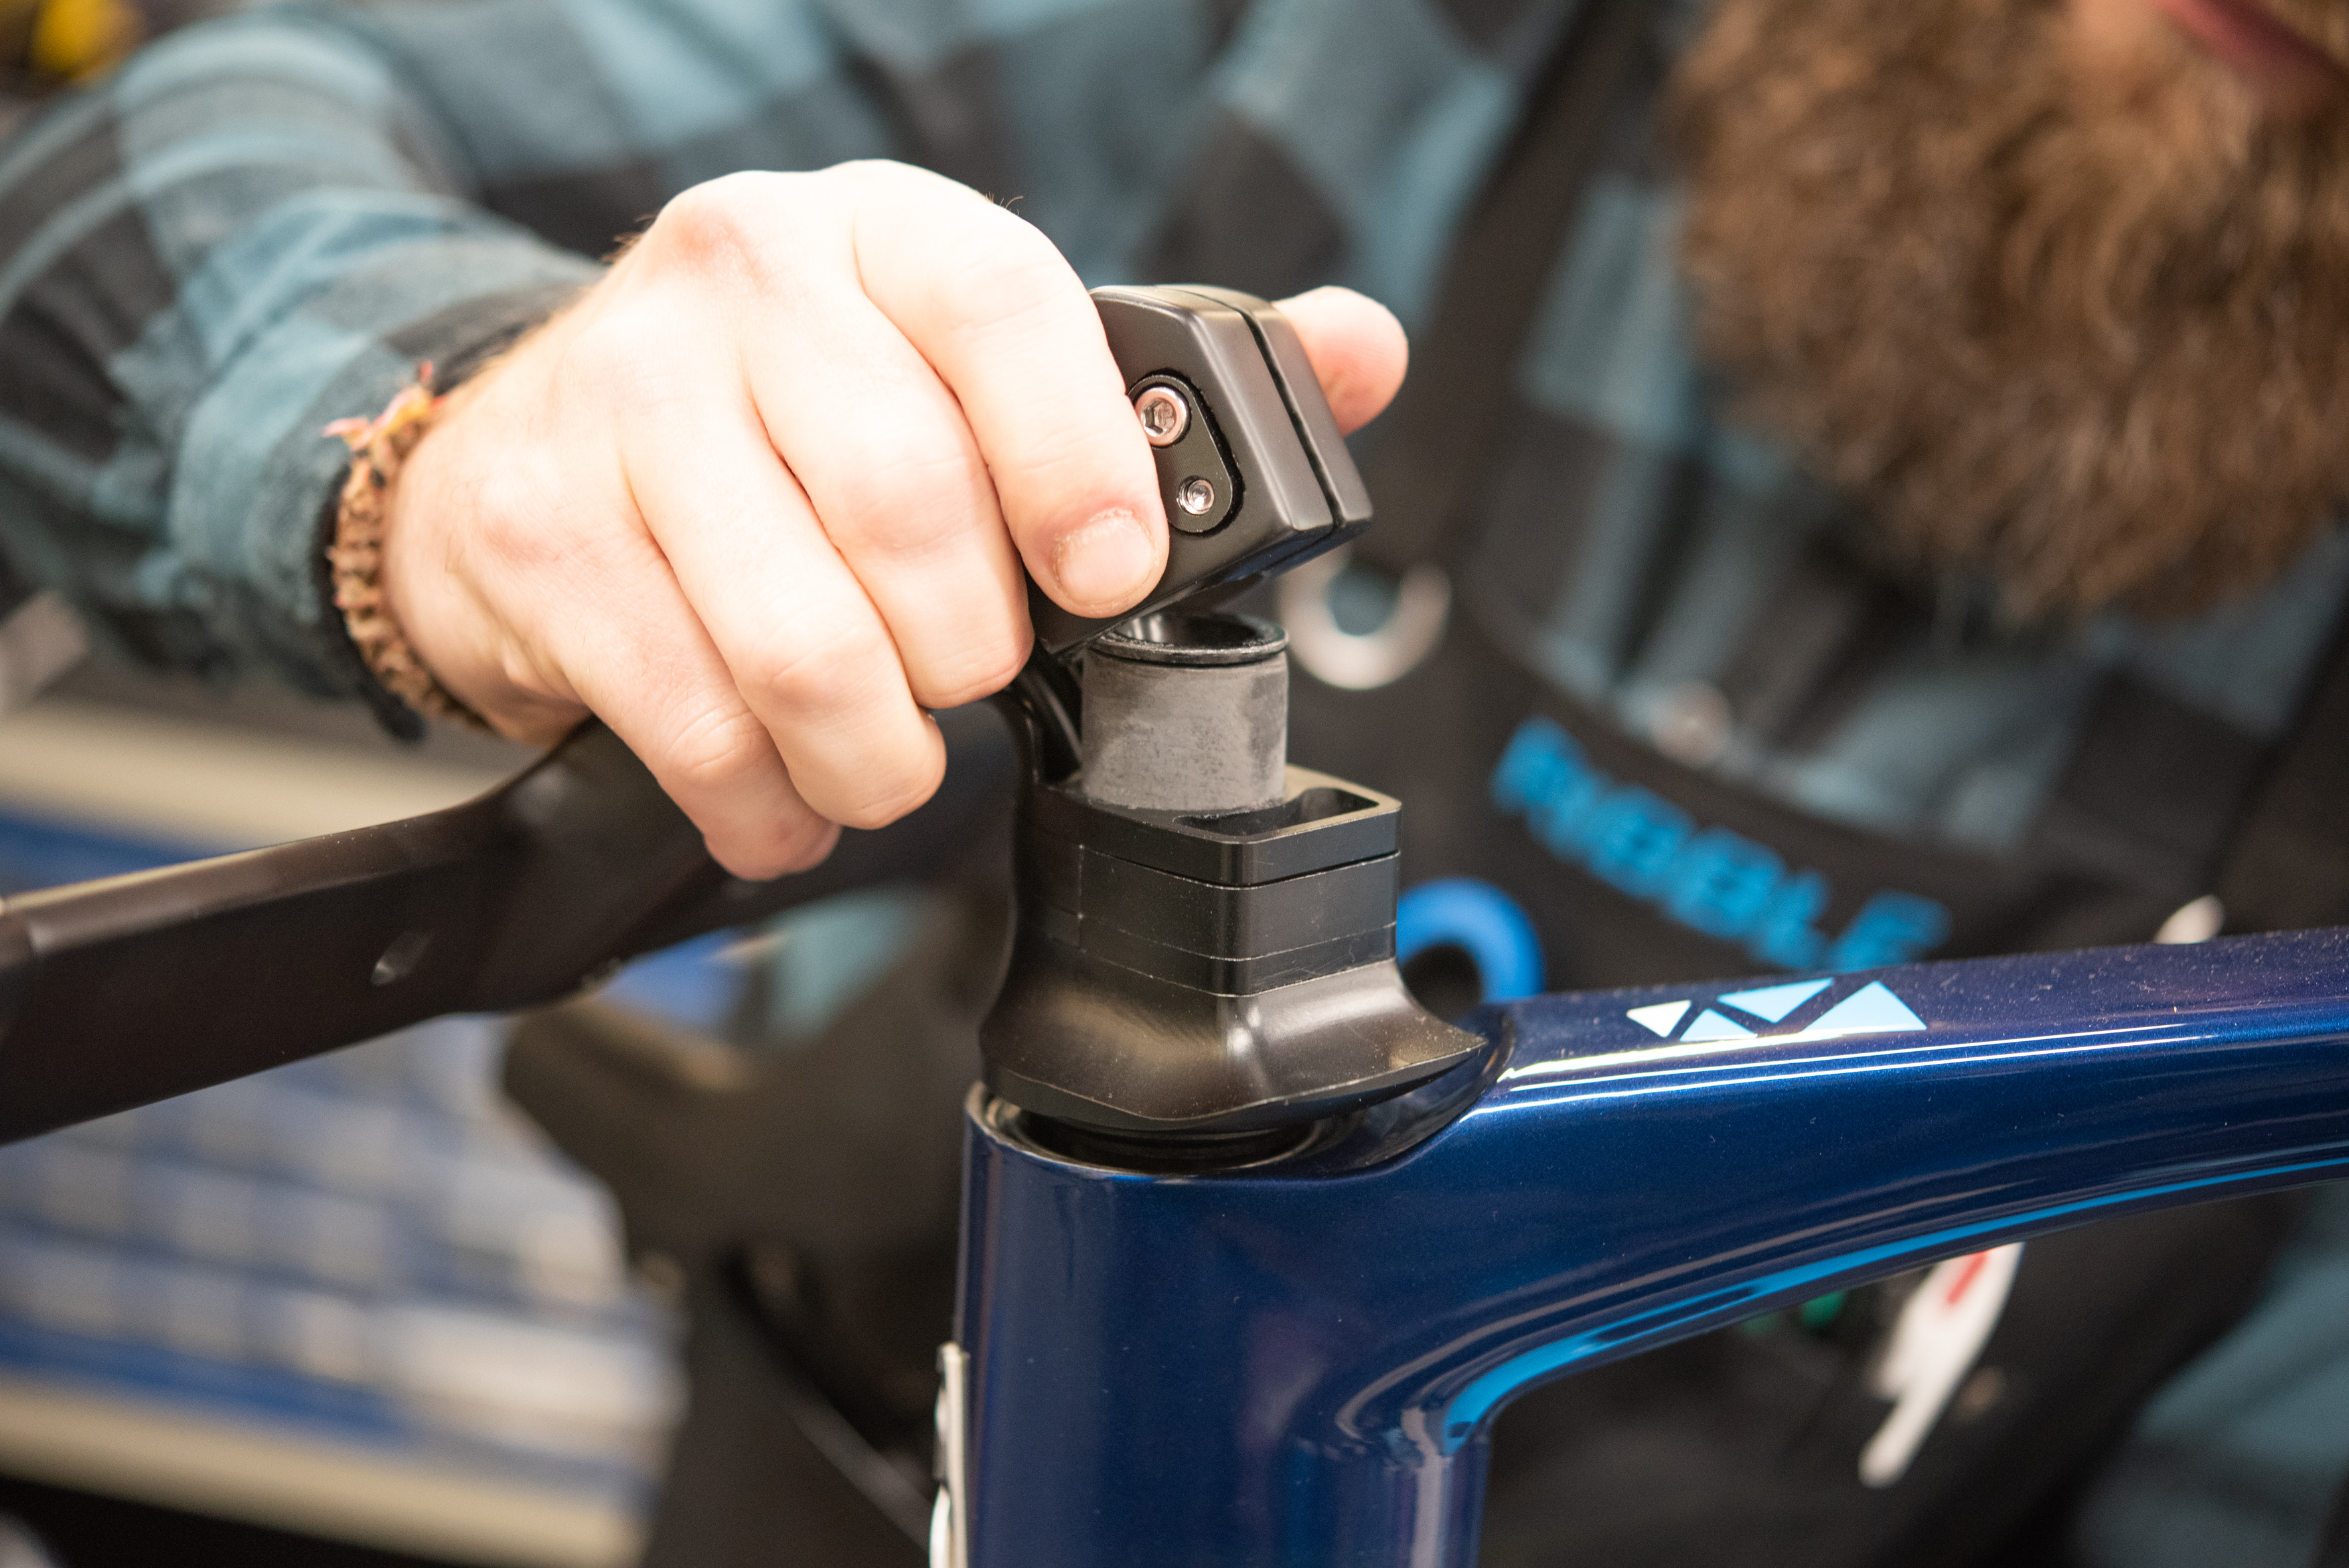
Fig 1
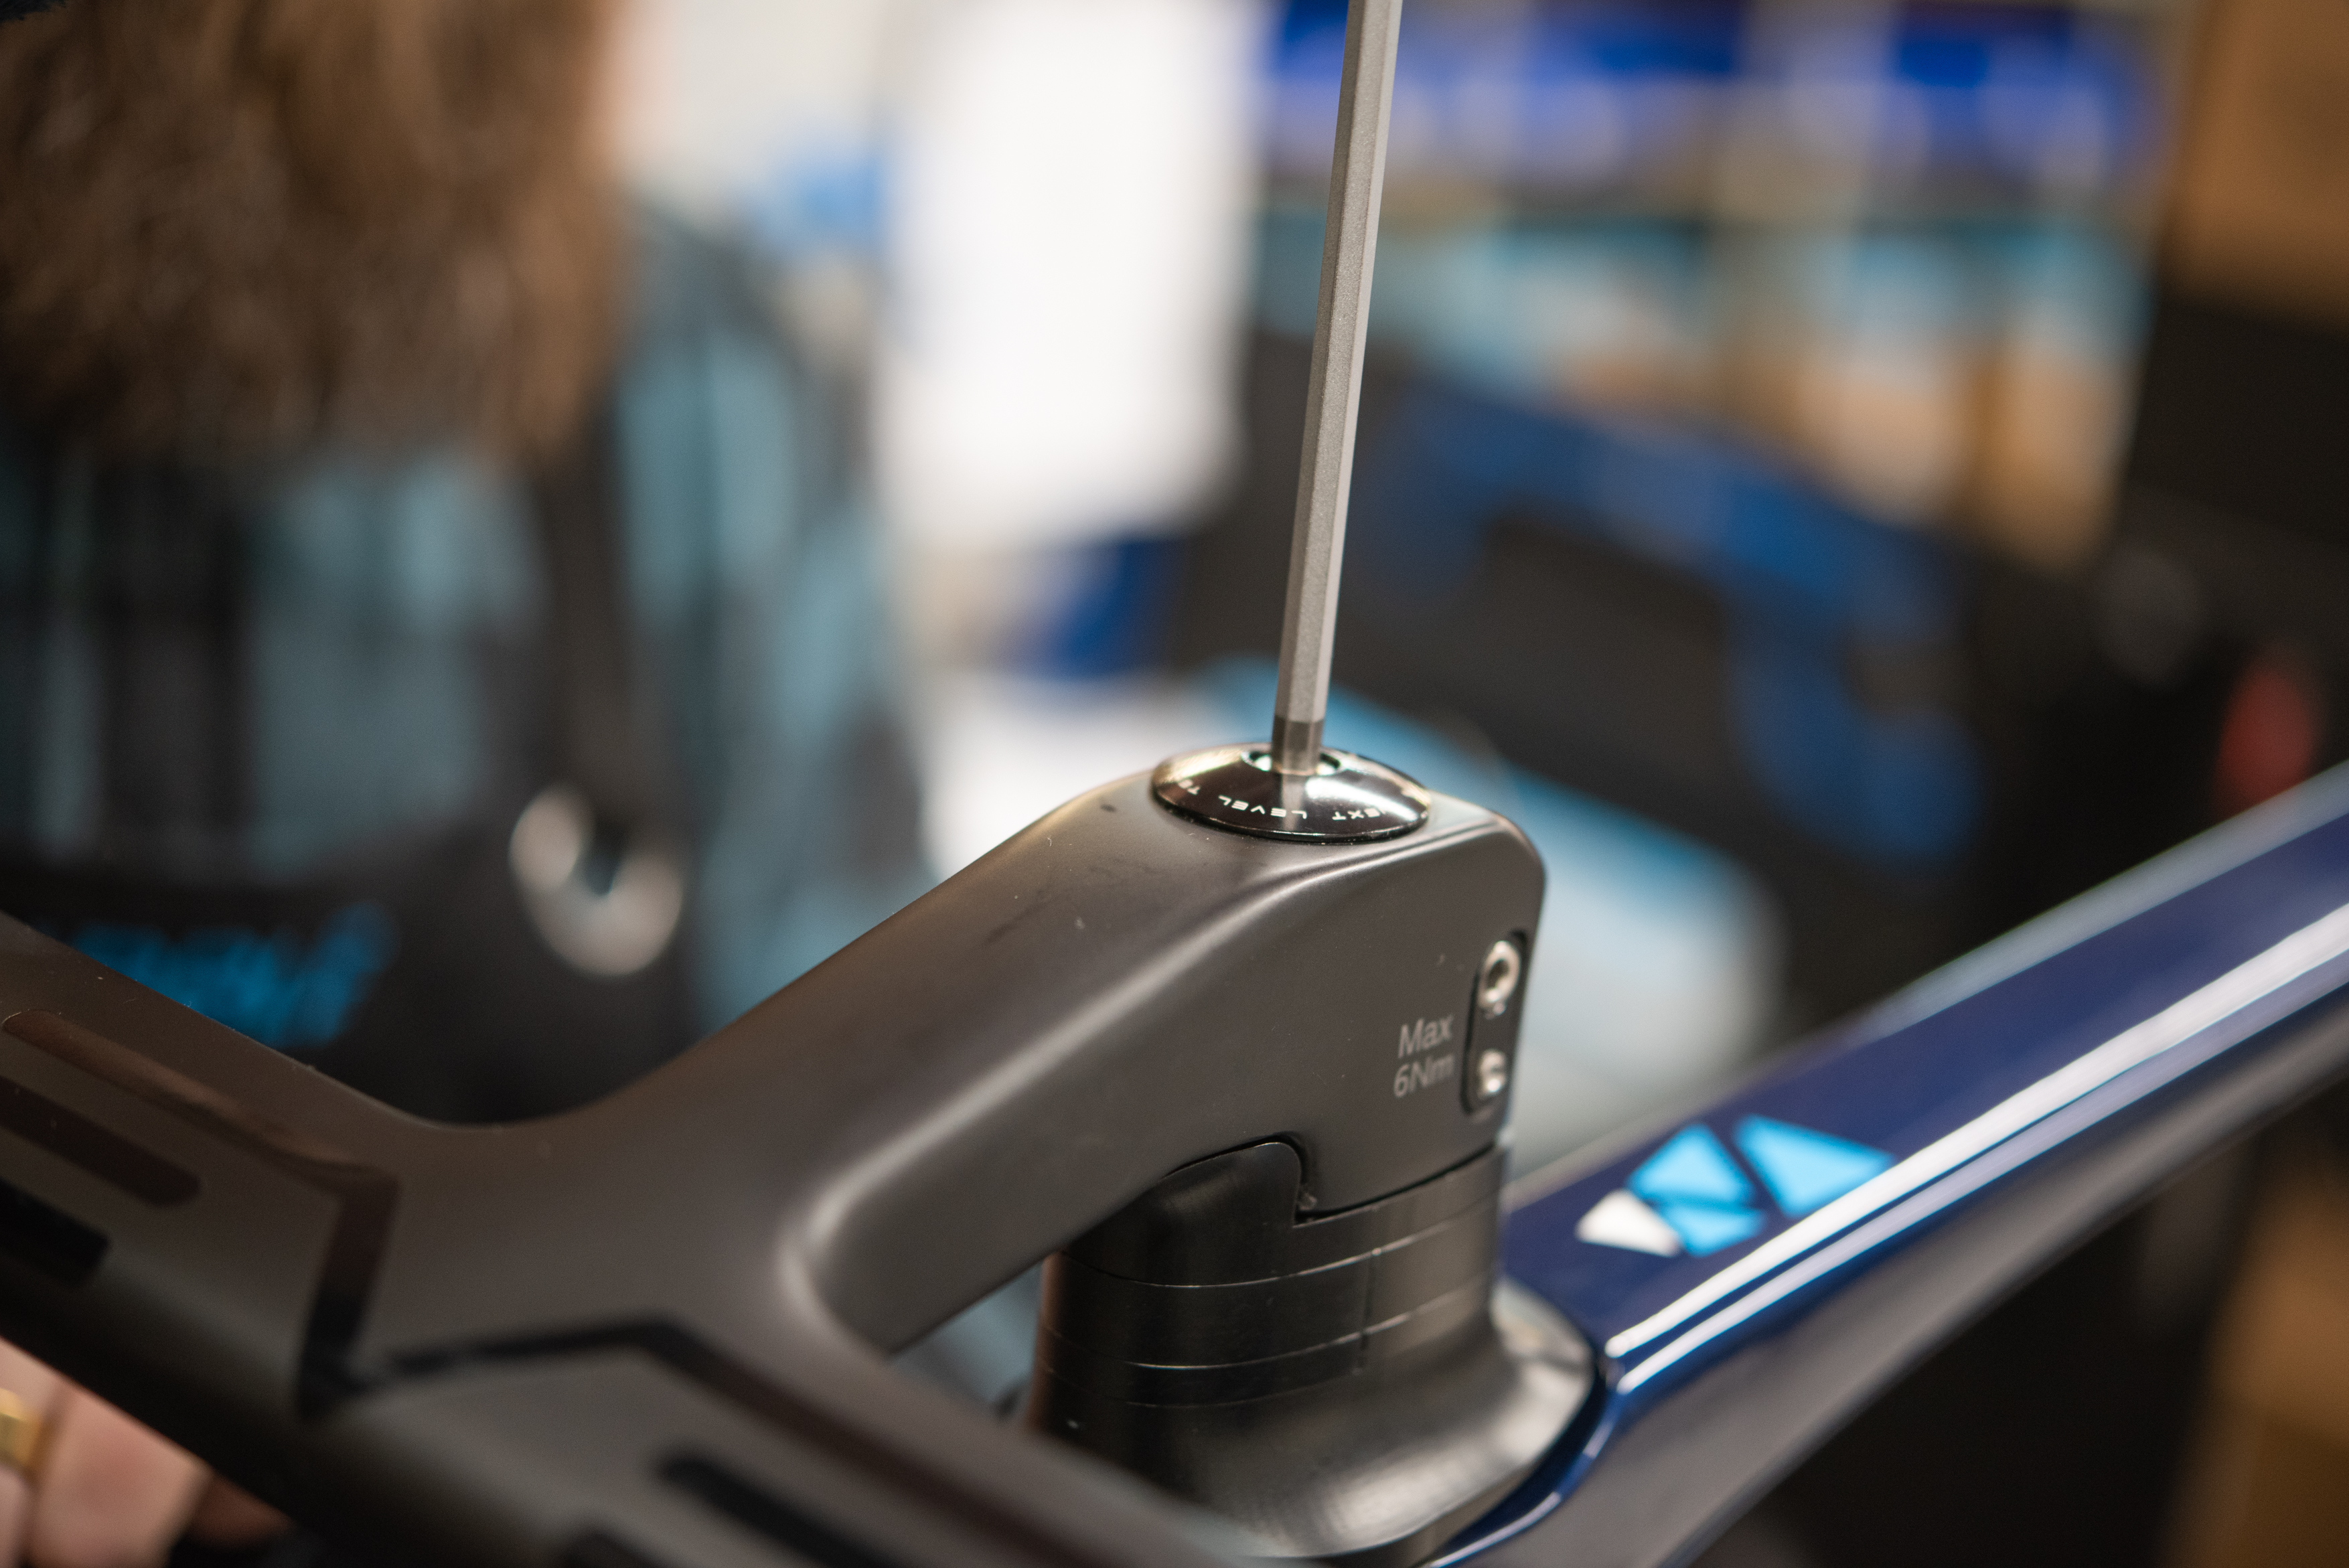
Fig 2
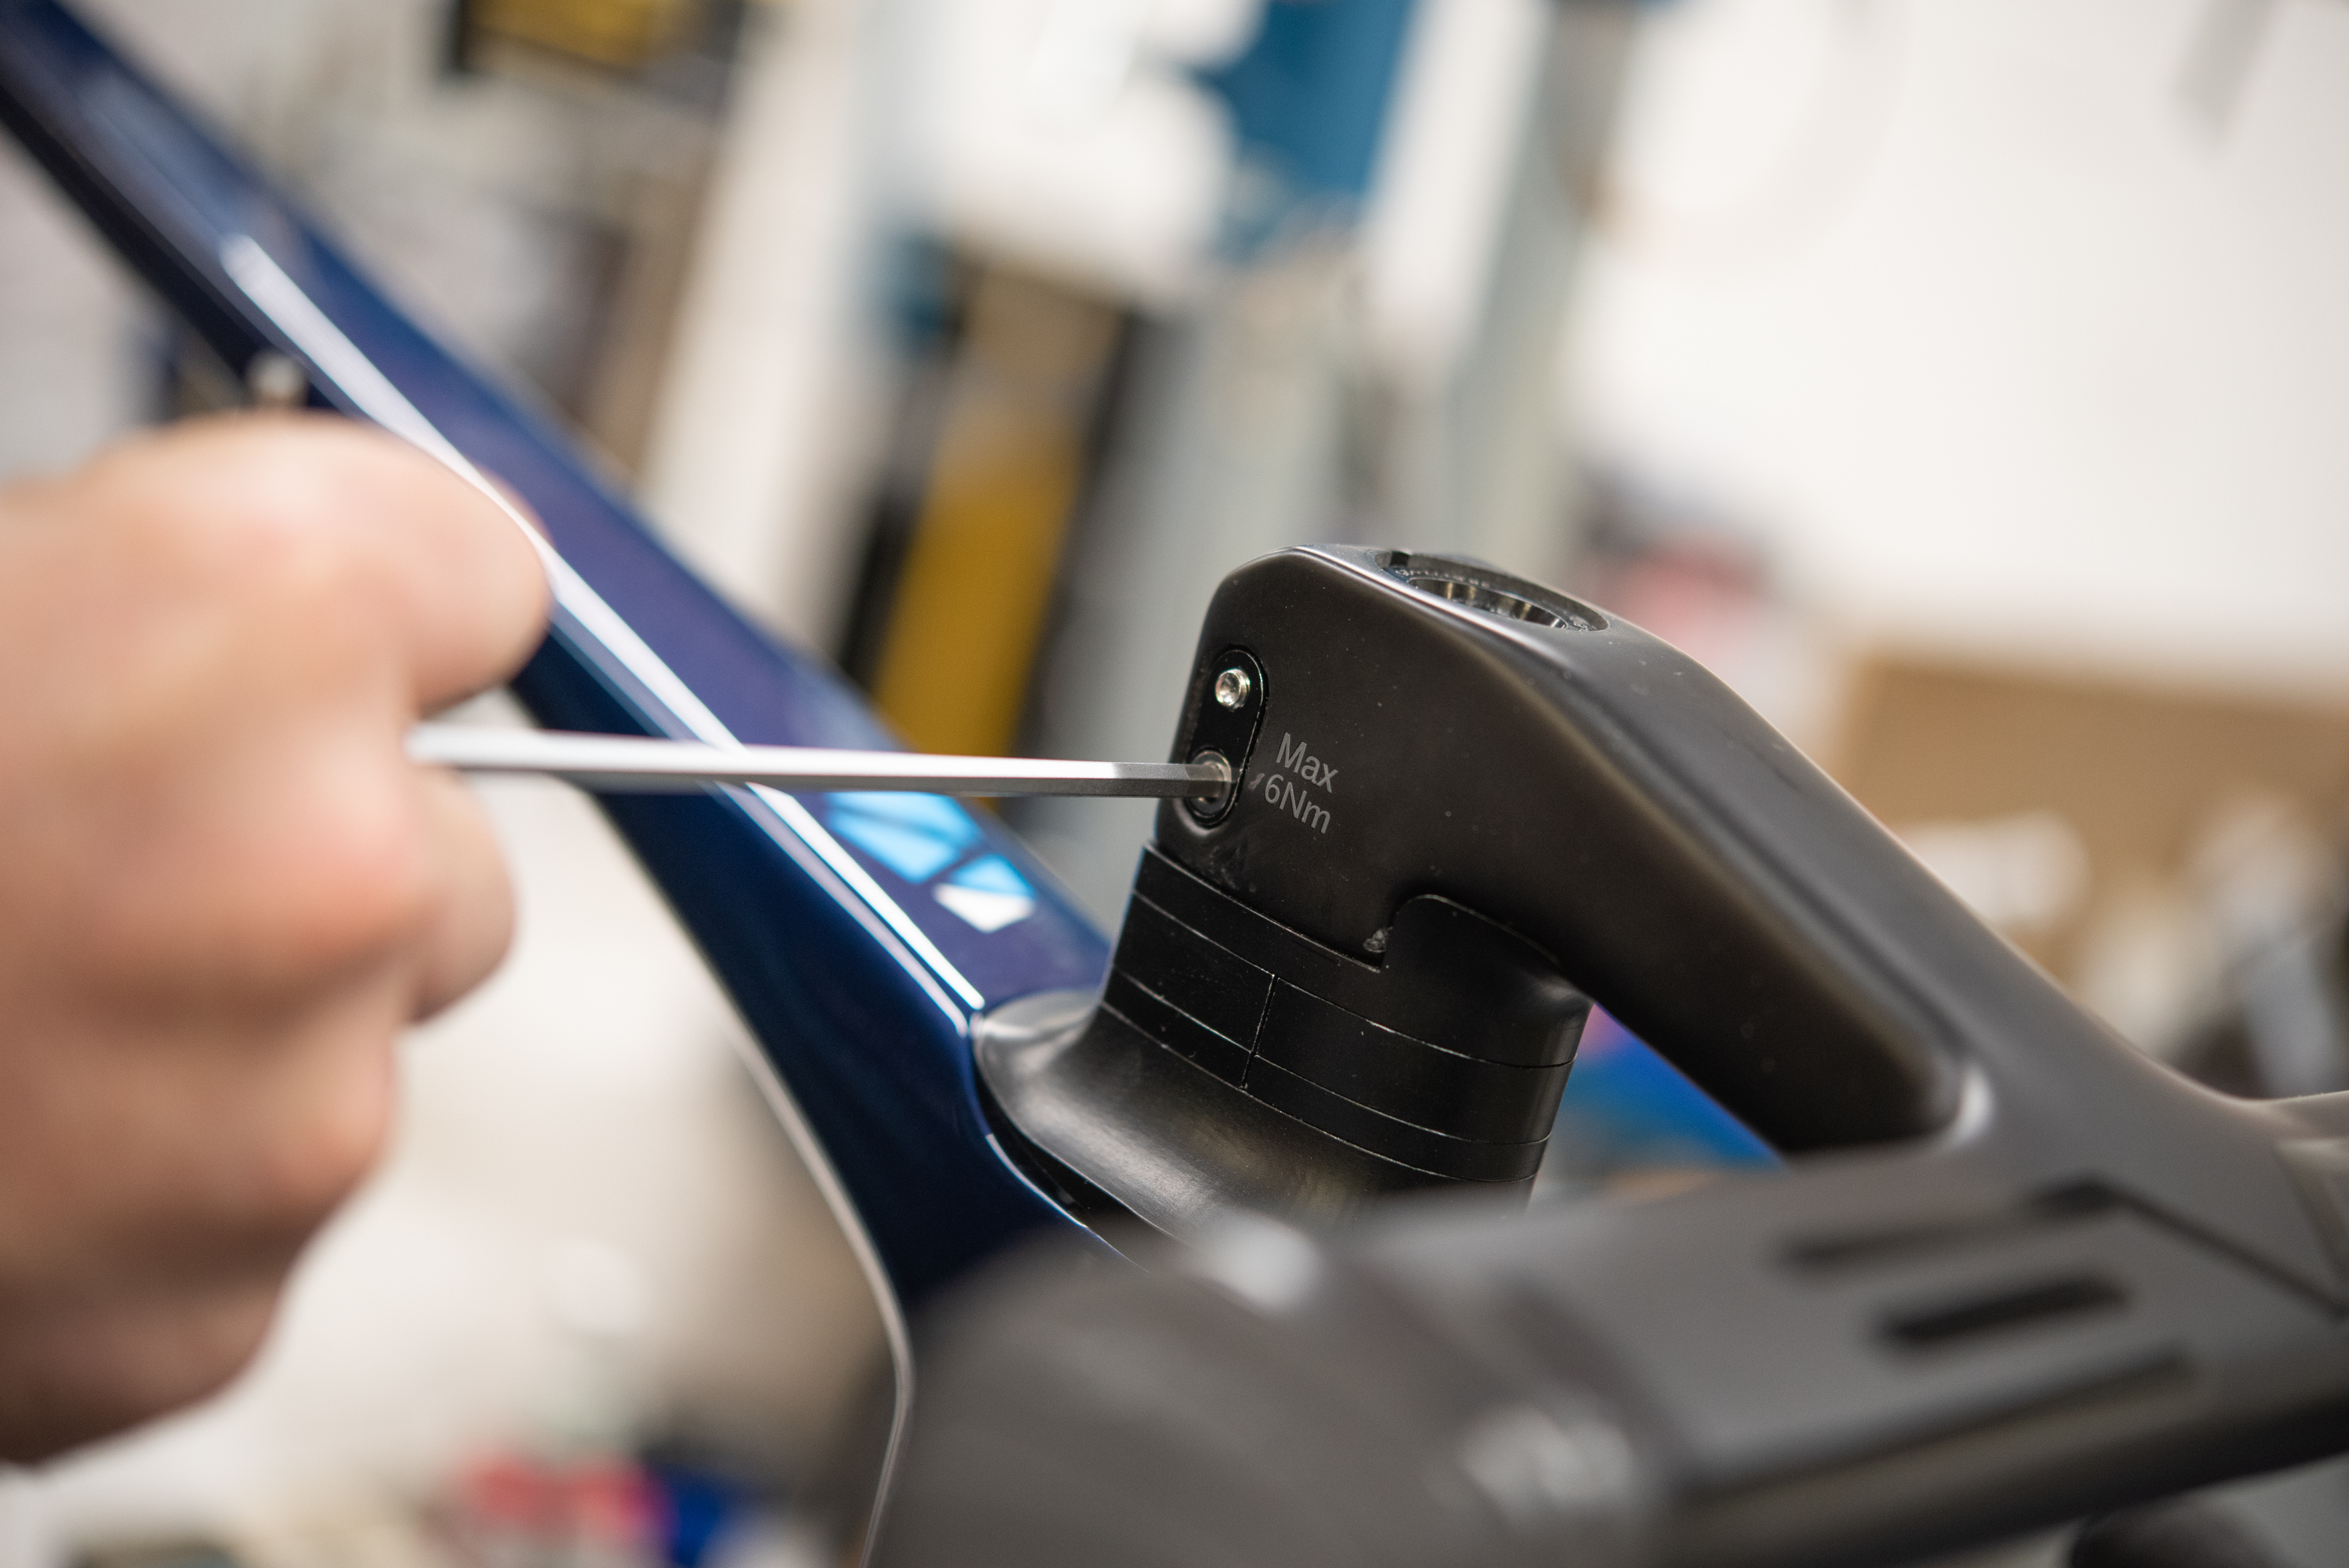
Fig 3
Integrated bars/stem: Follow these simple steps to re-attach them;
- Slide the bar/stem back onto the fork steerer (fig 1).
- Take your stem top cap and bolt and insert them into the expander in the fork (fig 2).
- Align your bars to the correct position and using a 5mm allen key tighten until there is no play in the headset. Apply the brakes and rock the bike backwards and forwards to check for play. A common question is how much should I torque this bolt up to? There is no torque setting for a headset just tighten enough to remove any play.
- Using a 4mm allen key tighten the 2 bolts on the rear of the stem to 6Nm (fig 3).
4. Fit the Seatpost and Saddle
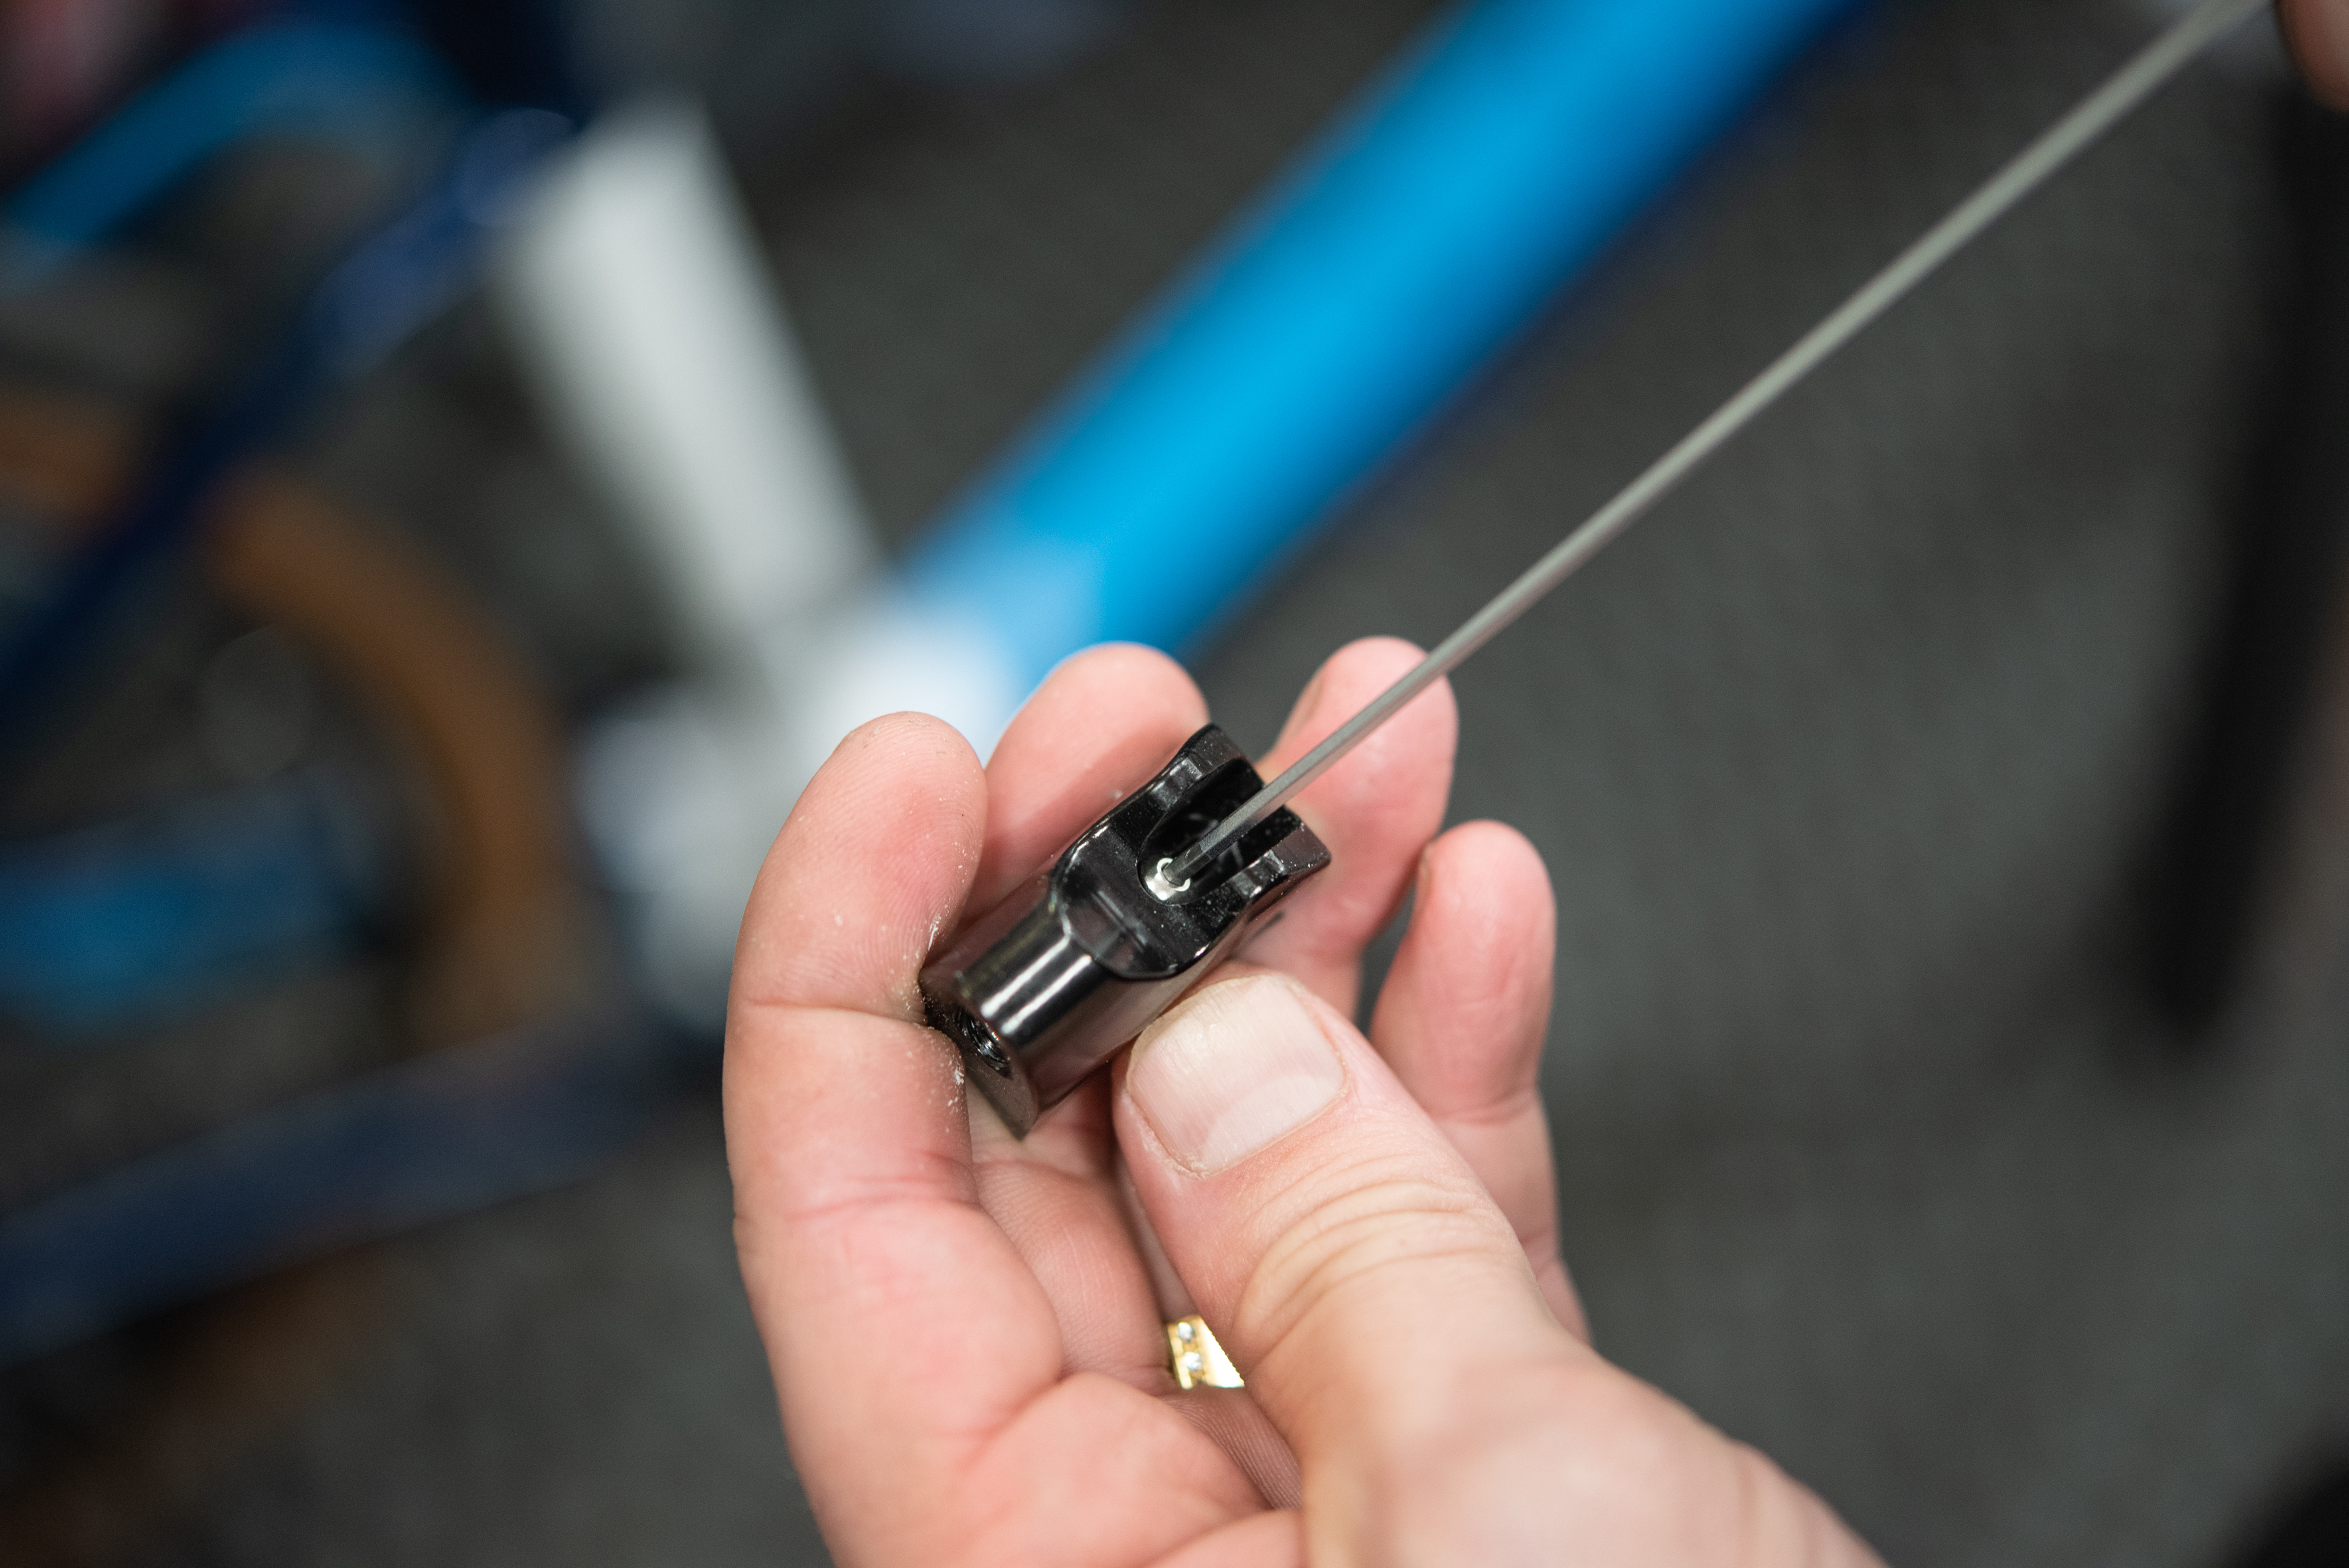
Fig 1
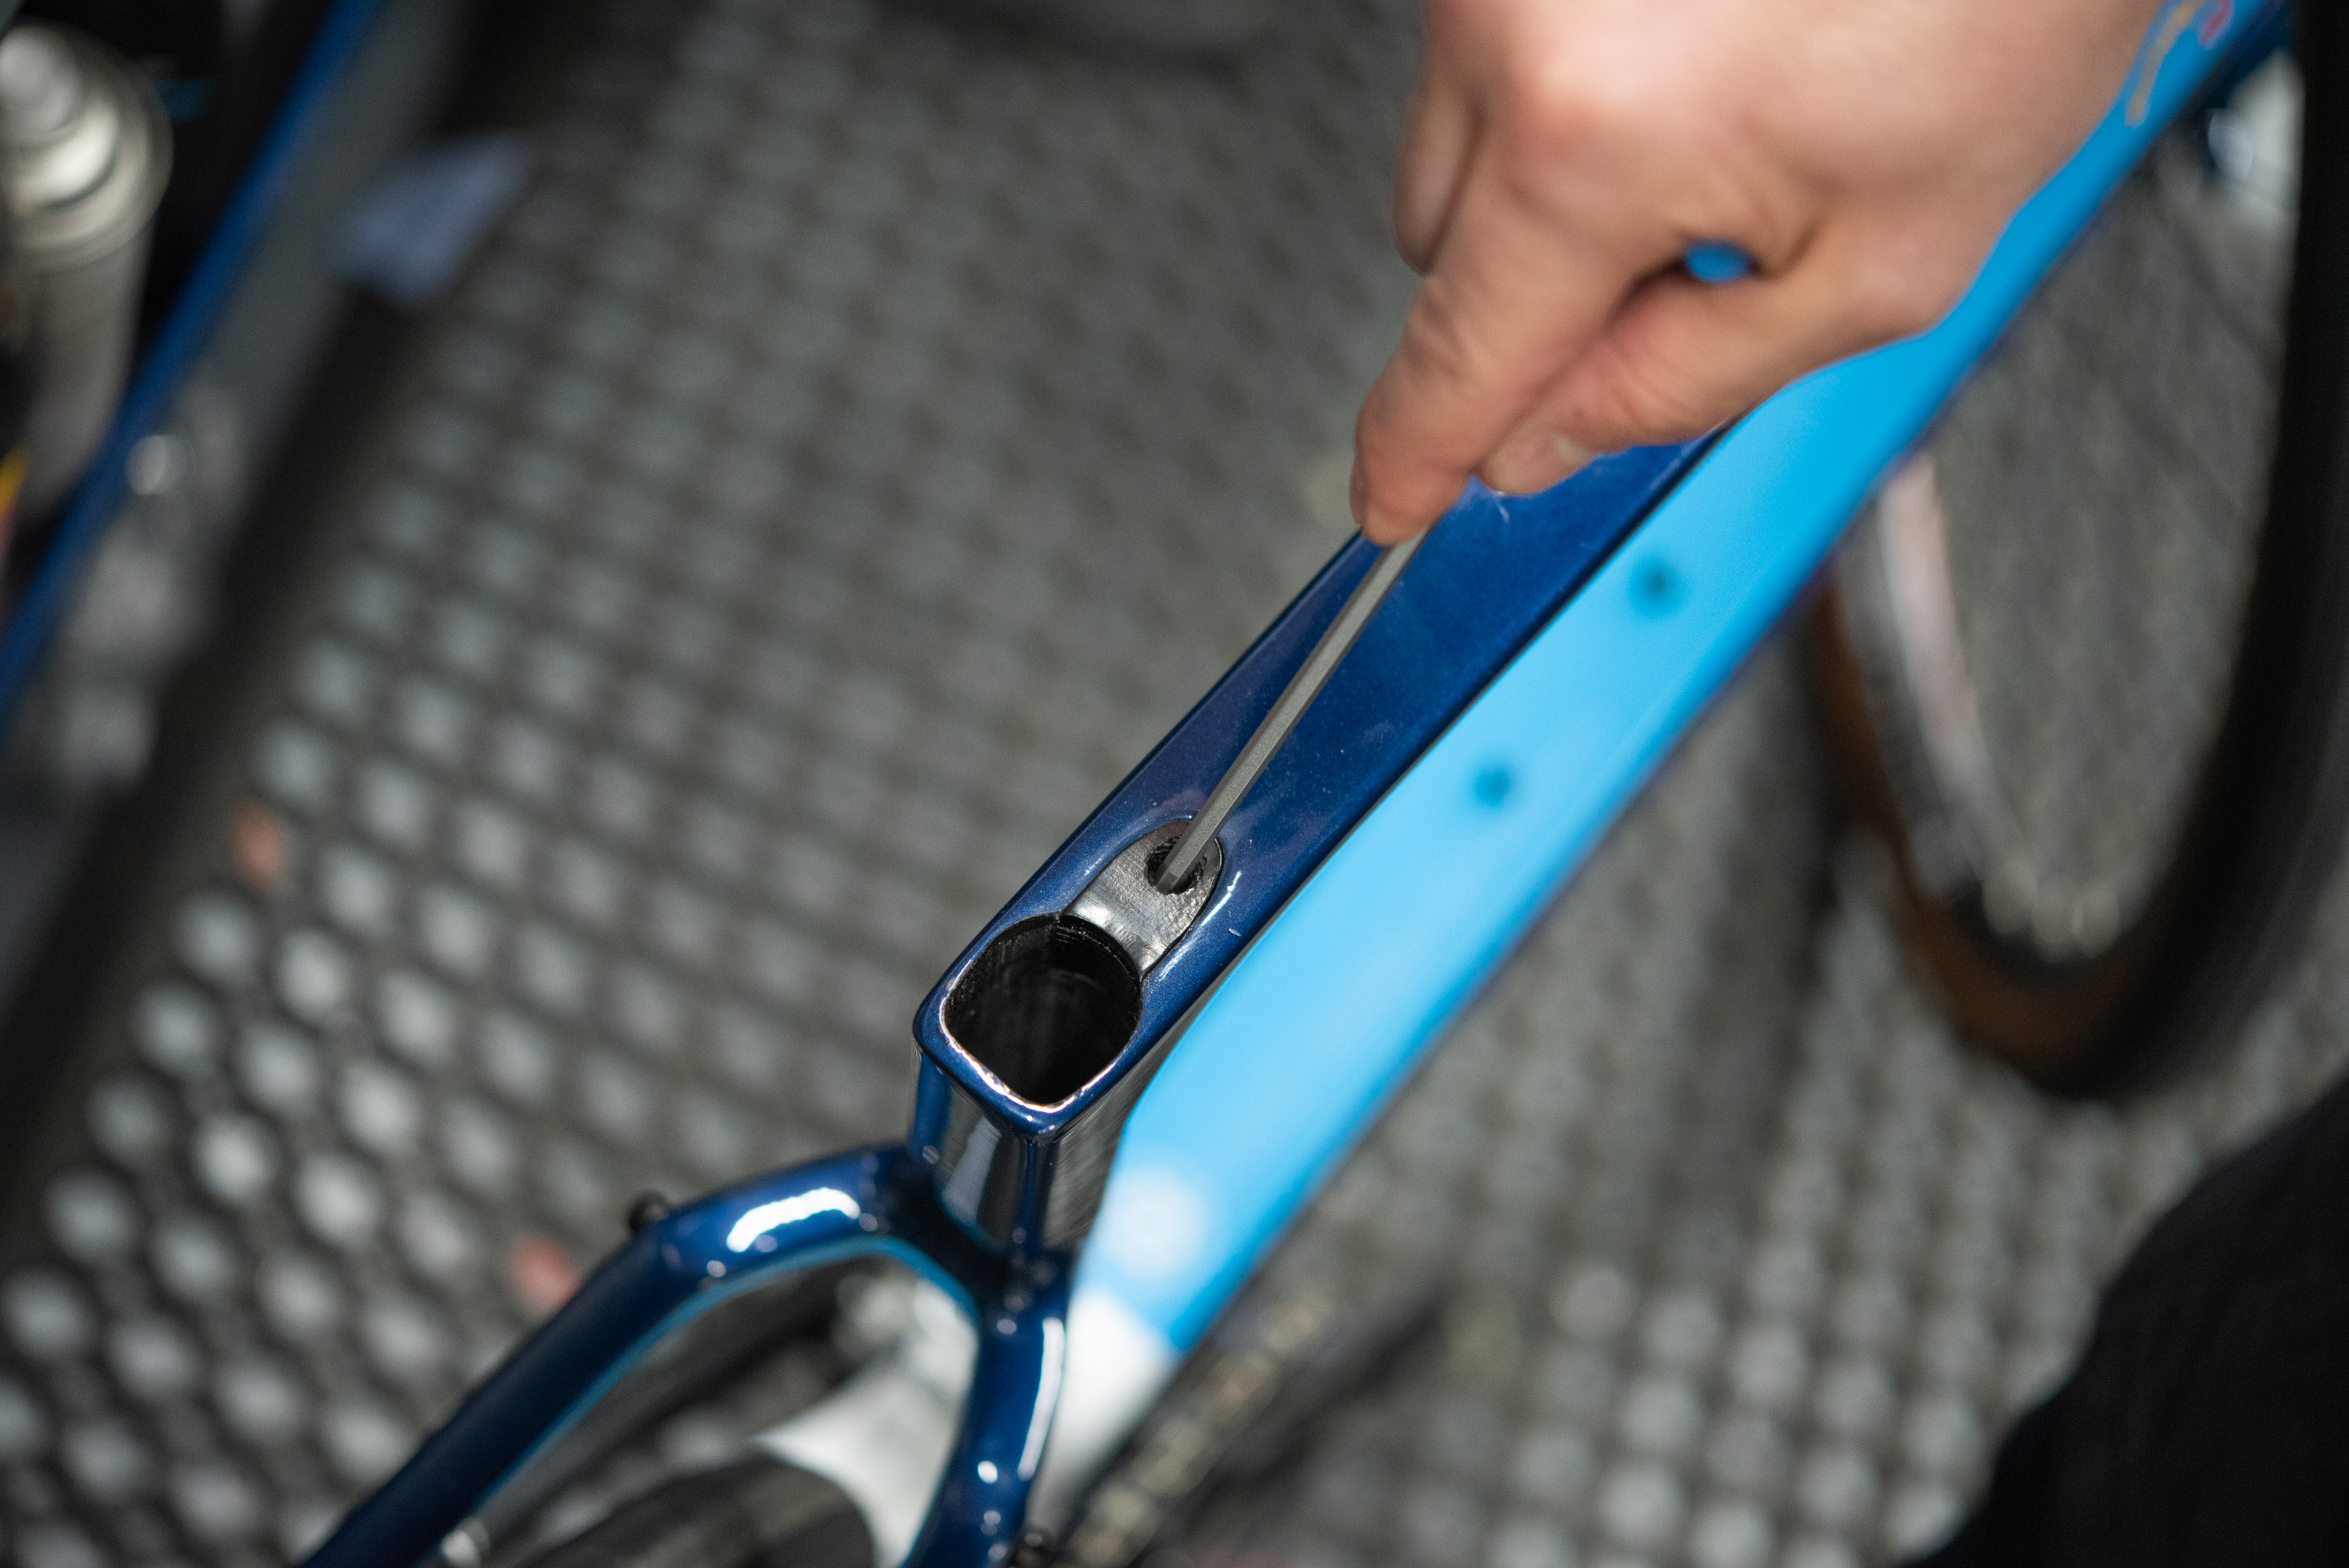
Fig 2
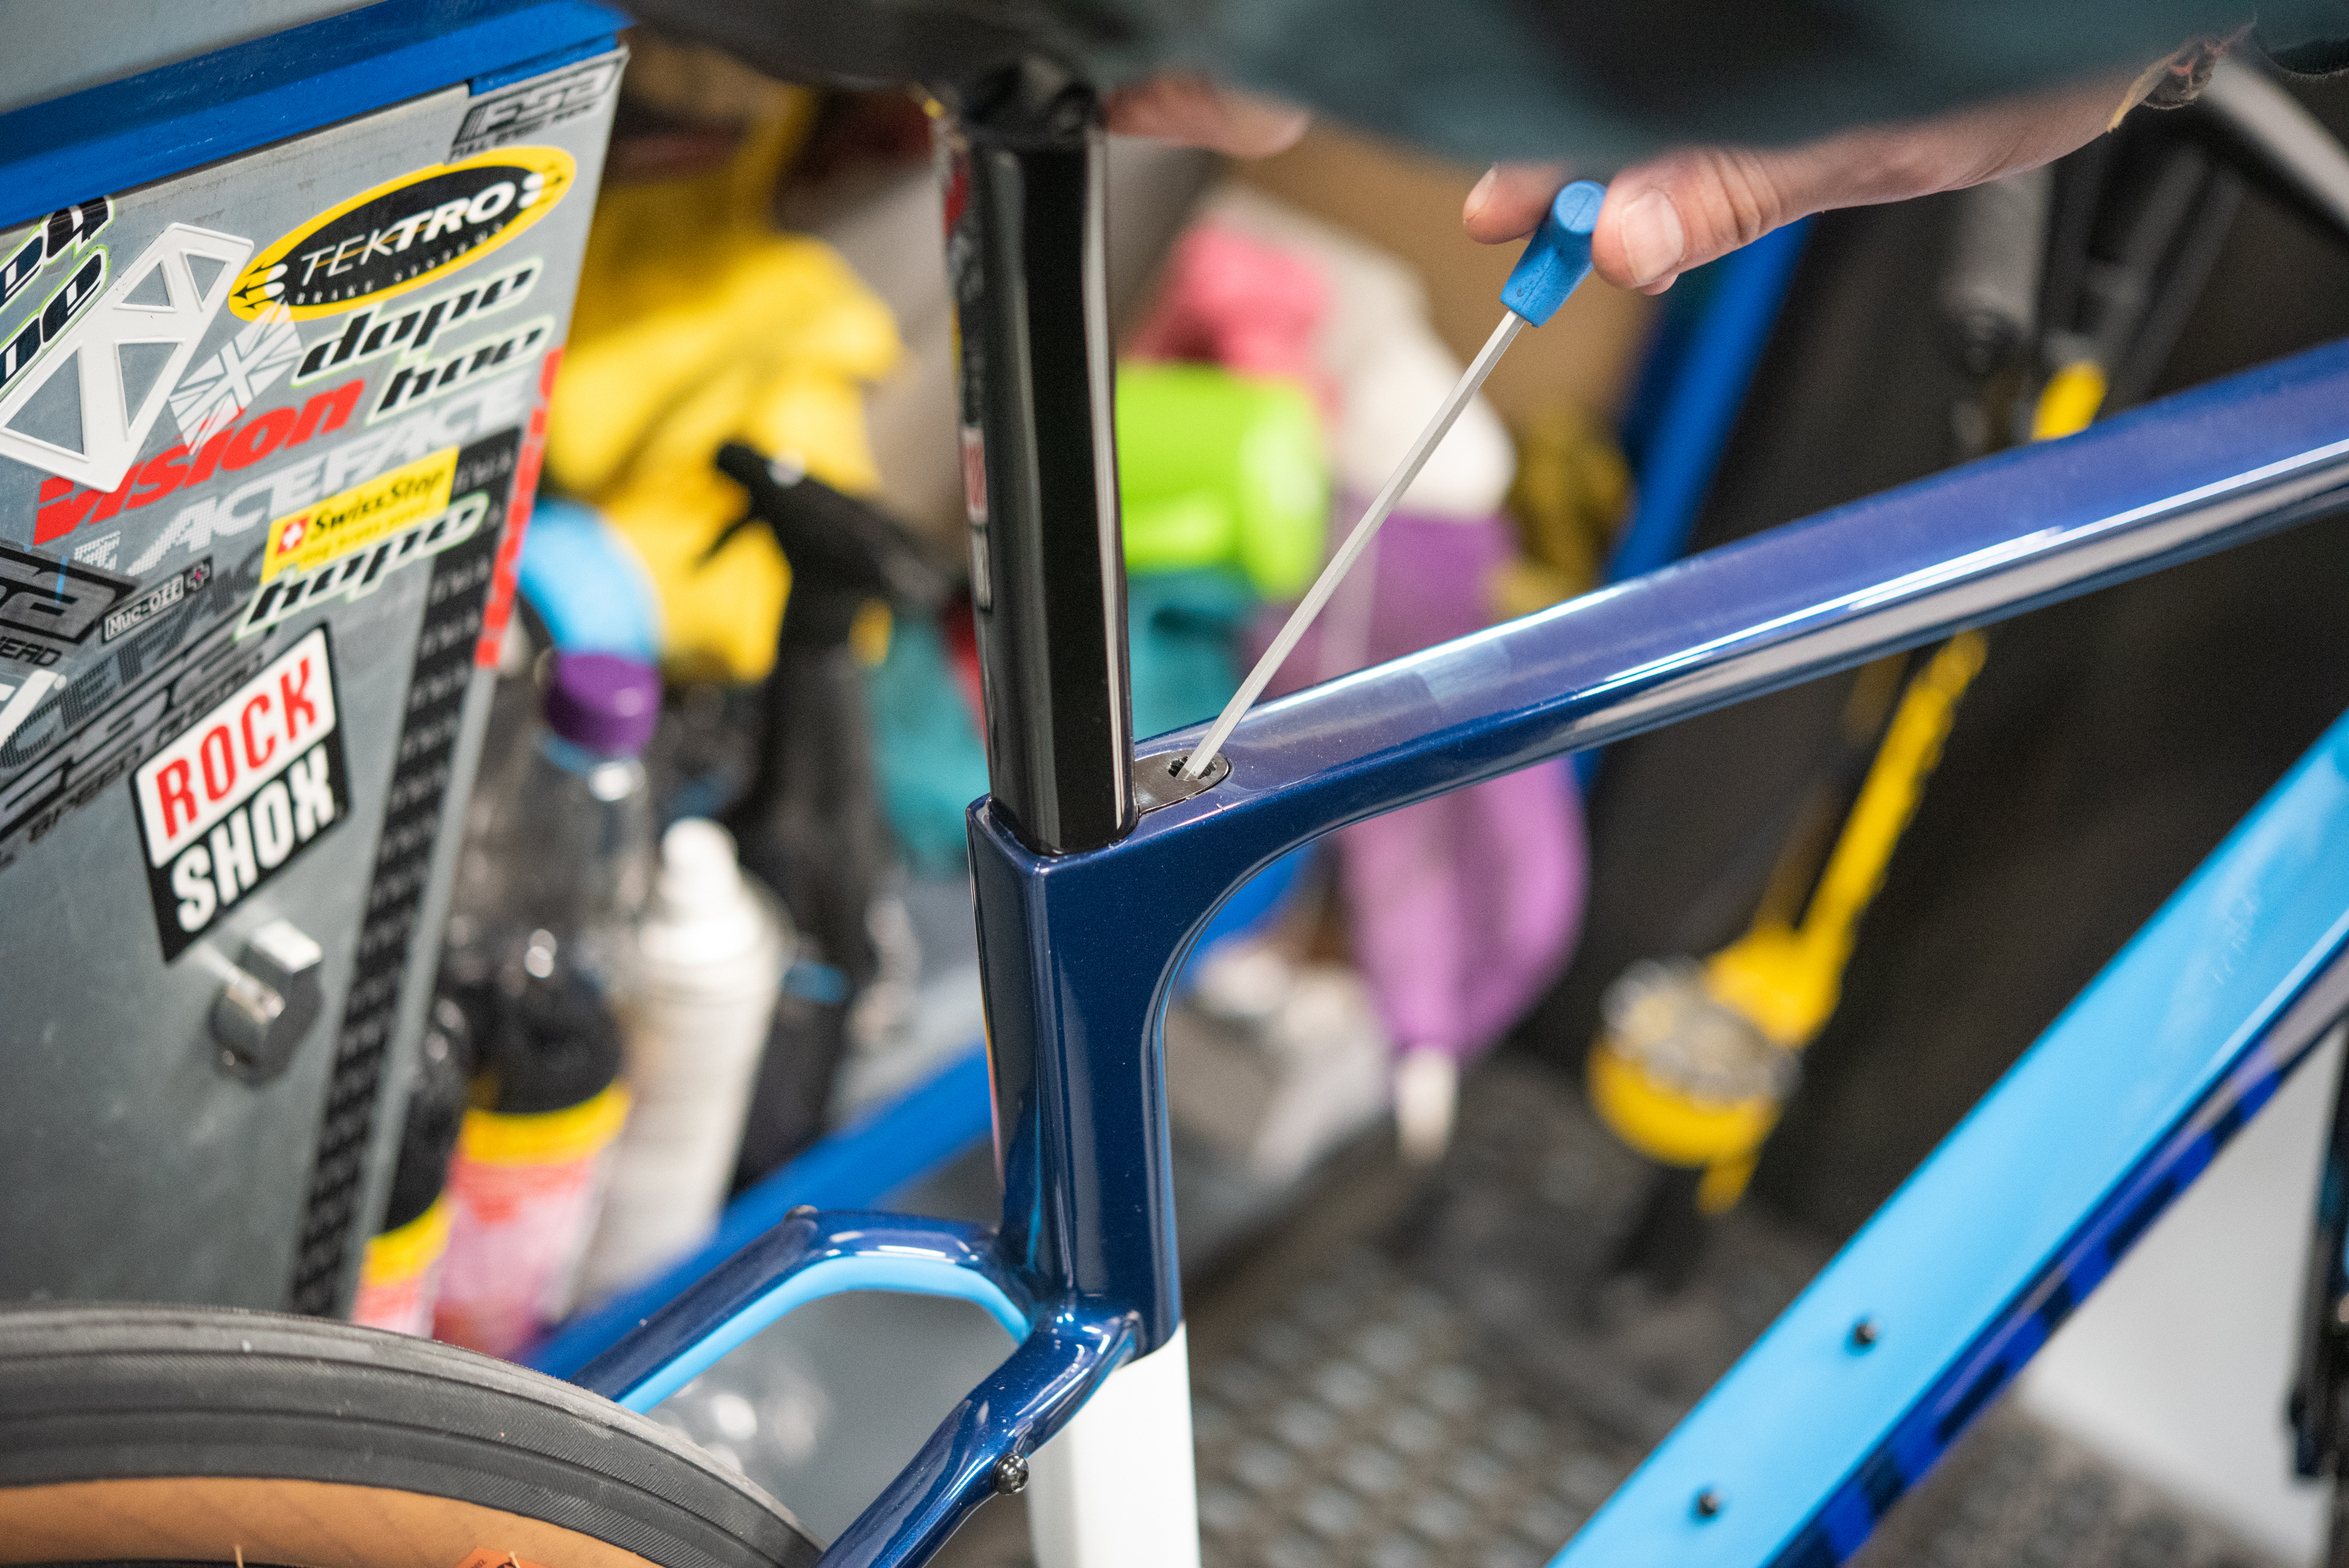
Fig 3
If the bike is fitted with a wedge system in the top tube then follow these steps to fit the seatpost and saddle.
Using a 2mm allen key tighten the little grub screw on the underside of the wedge which enables you to fit it into the seat tube (fig 1).
Insert the wedge into the seat tube (fig 2).
Elevate the rear wheel slightly and then slide the seatpost into the seat tube. Warning: if you do not elevate the rear wheel it can be difficult to insert the seat post.
Adjust the seatpost to the correct height and then tighten the bolt in the top of the wedge to 8Nm (fig 3).
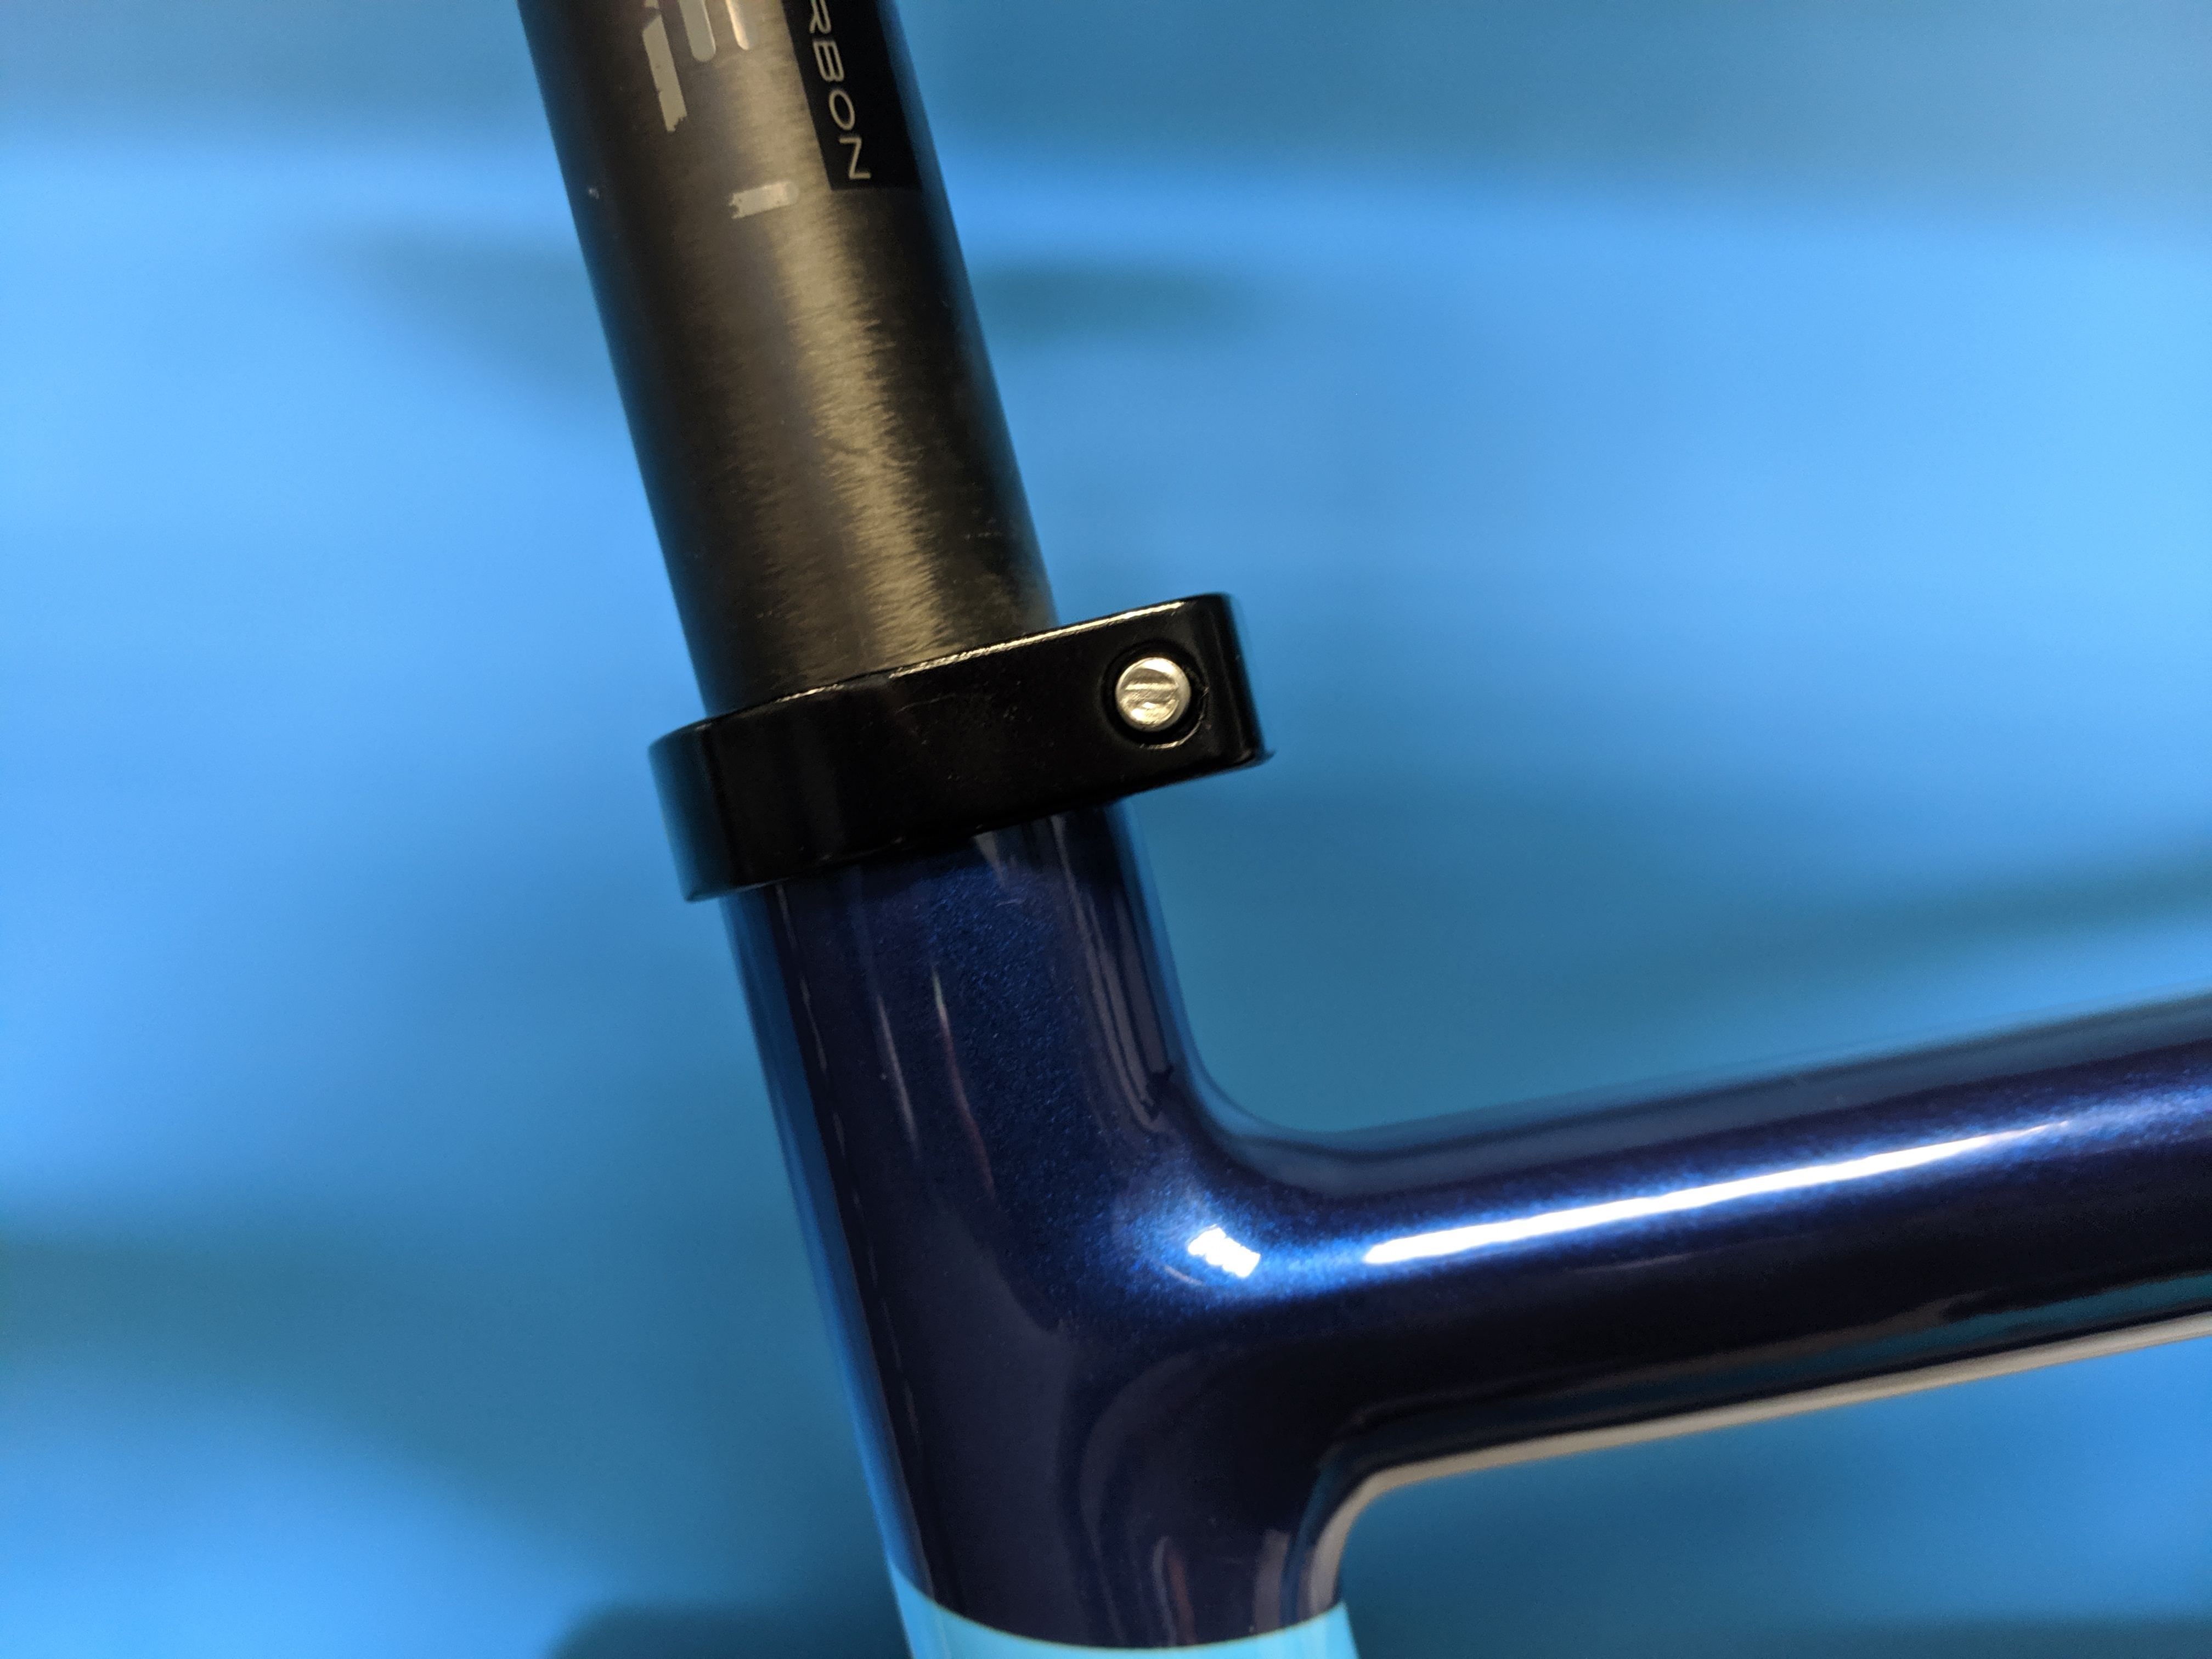
Fig 4. An external seat collar
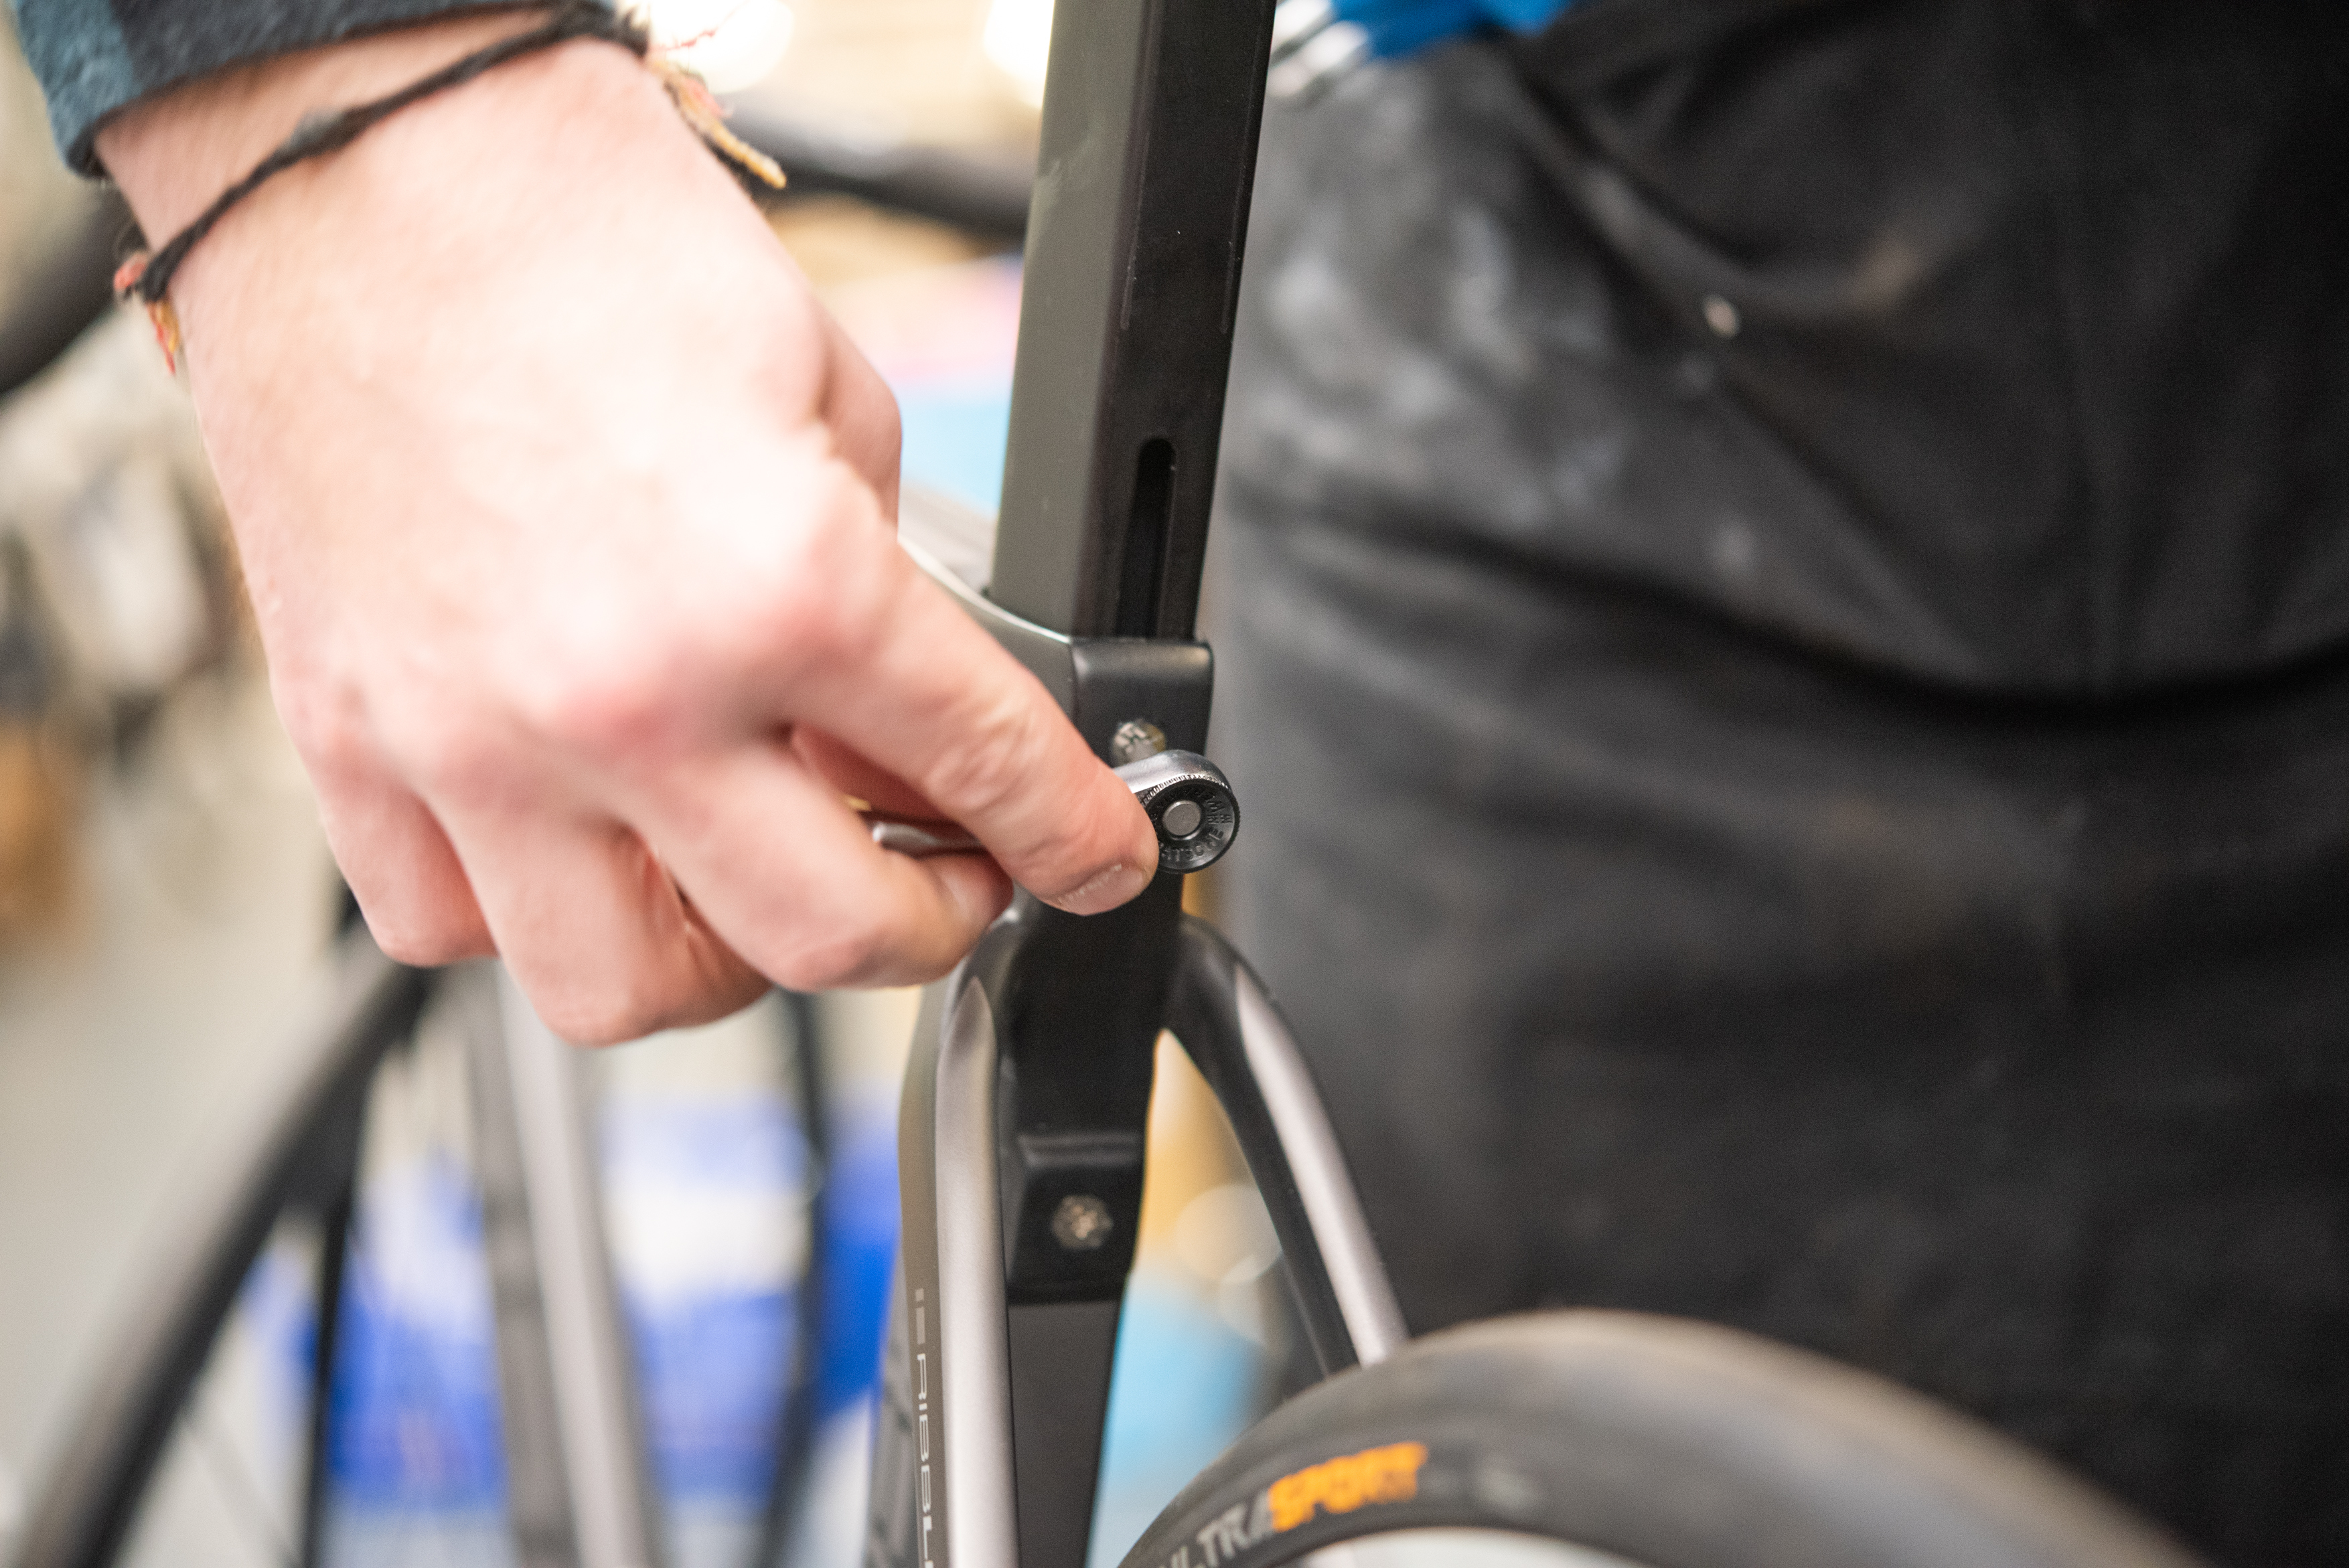
Fig 5 The Aero 883 system
If the bike uses an external seat collar (fig 4) simply slide the seatpost into the seat tube and once adjusted to the correct height tighten to 5-7Nm.
If you have received the Aero 883 then this uses a unique design of 2 bolts in the rear of the seat tube (fig 5). These 2 bolts screw into a removable plate in the rear of the seatpost. Take care not to completely release these 2 bolts from this plate, as it will fall into the frame. Warning; If you use an allen key take care not to over-tighten the bolts ( we recommend that a torque wrench is used to tighten them to 8Nm).
5. Adjust the saddle
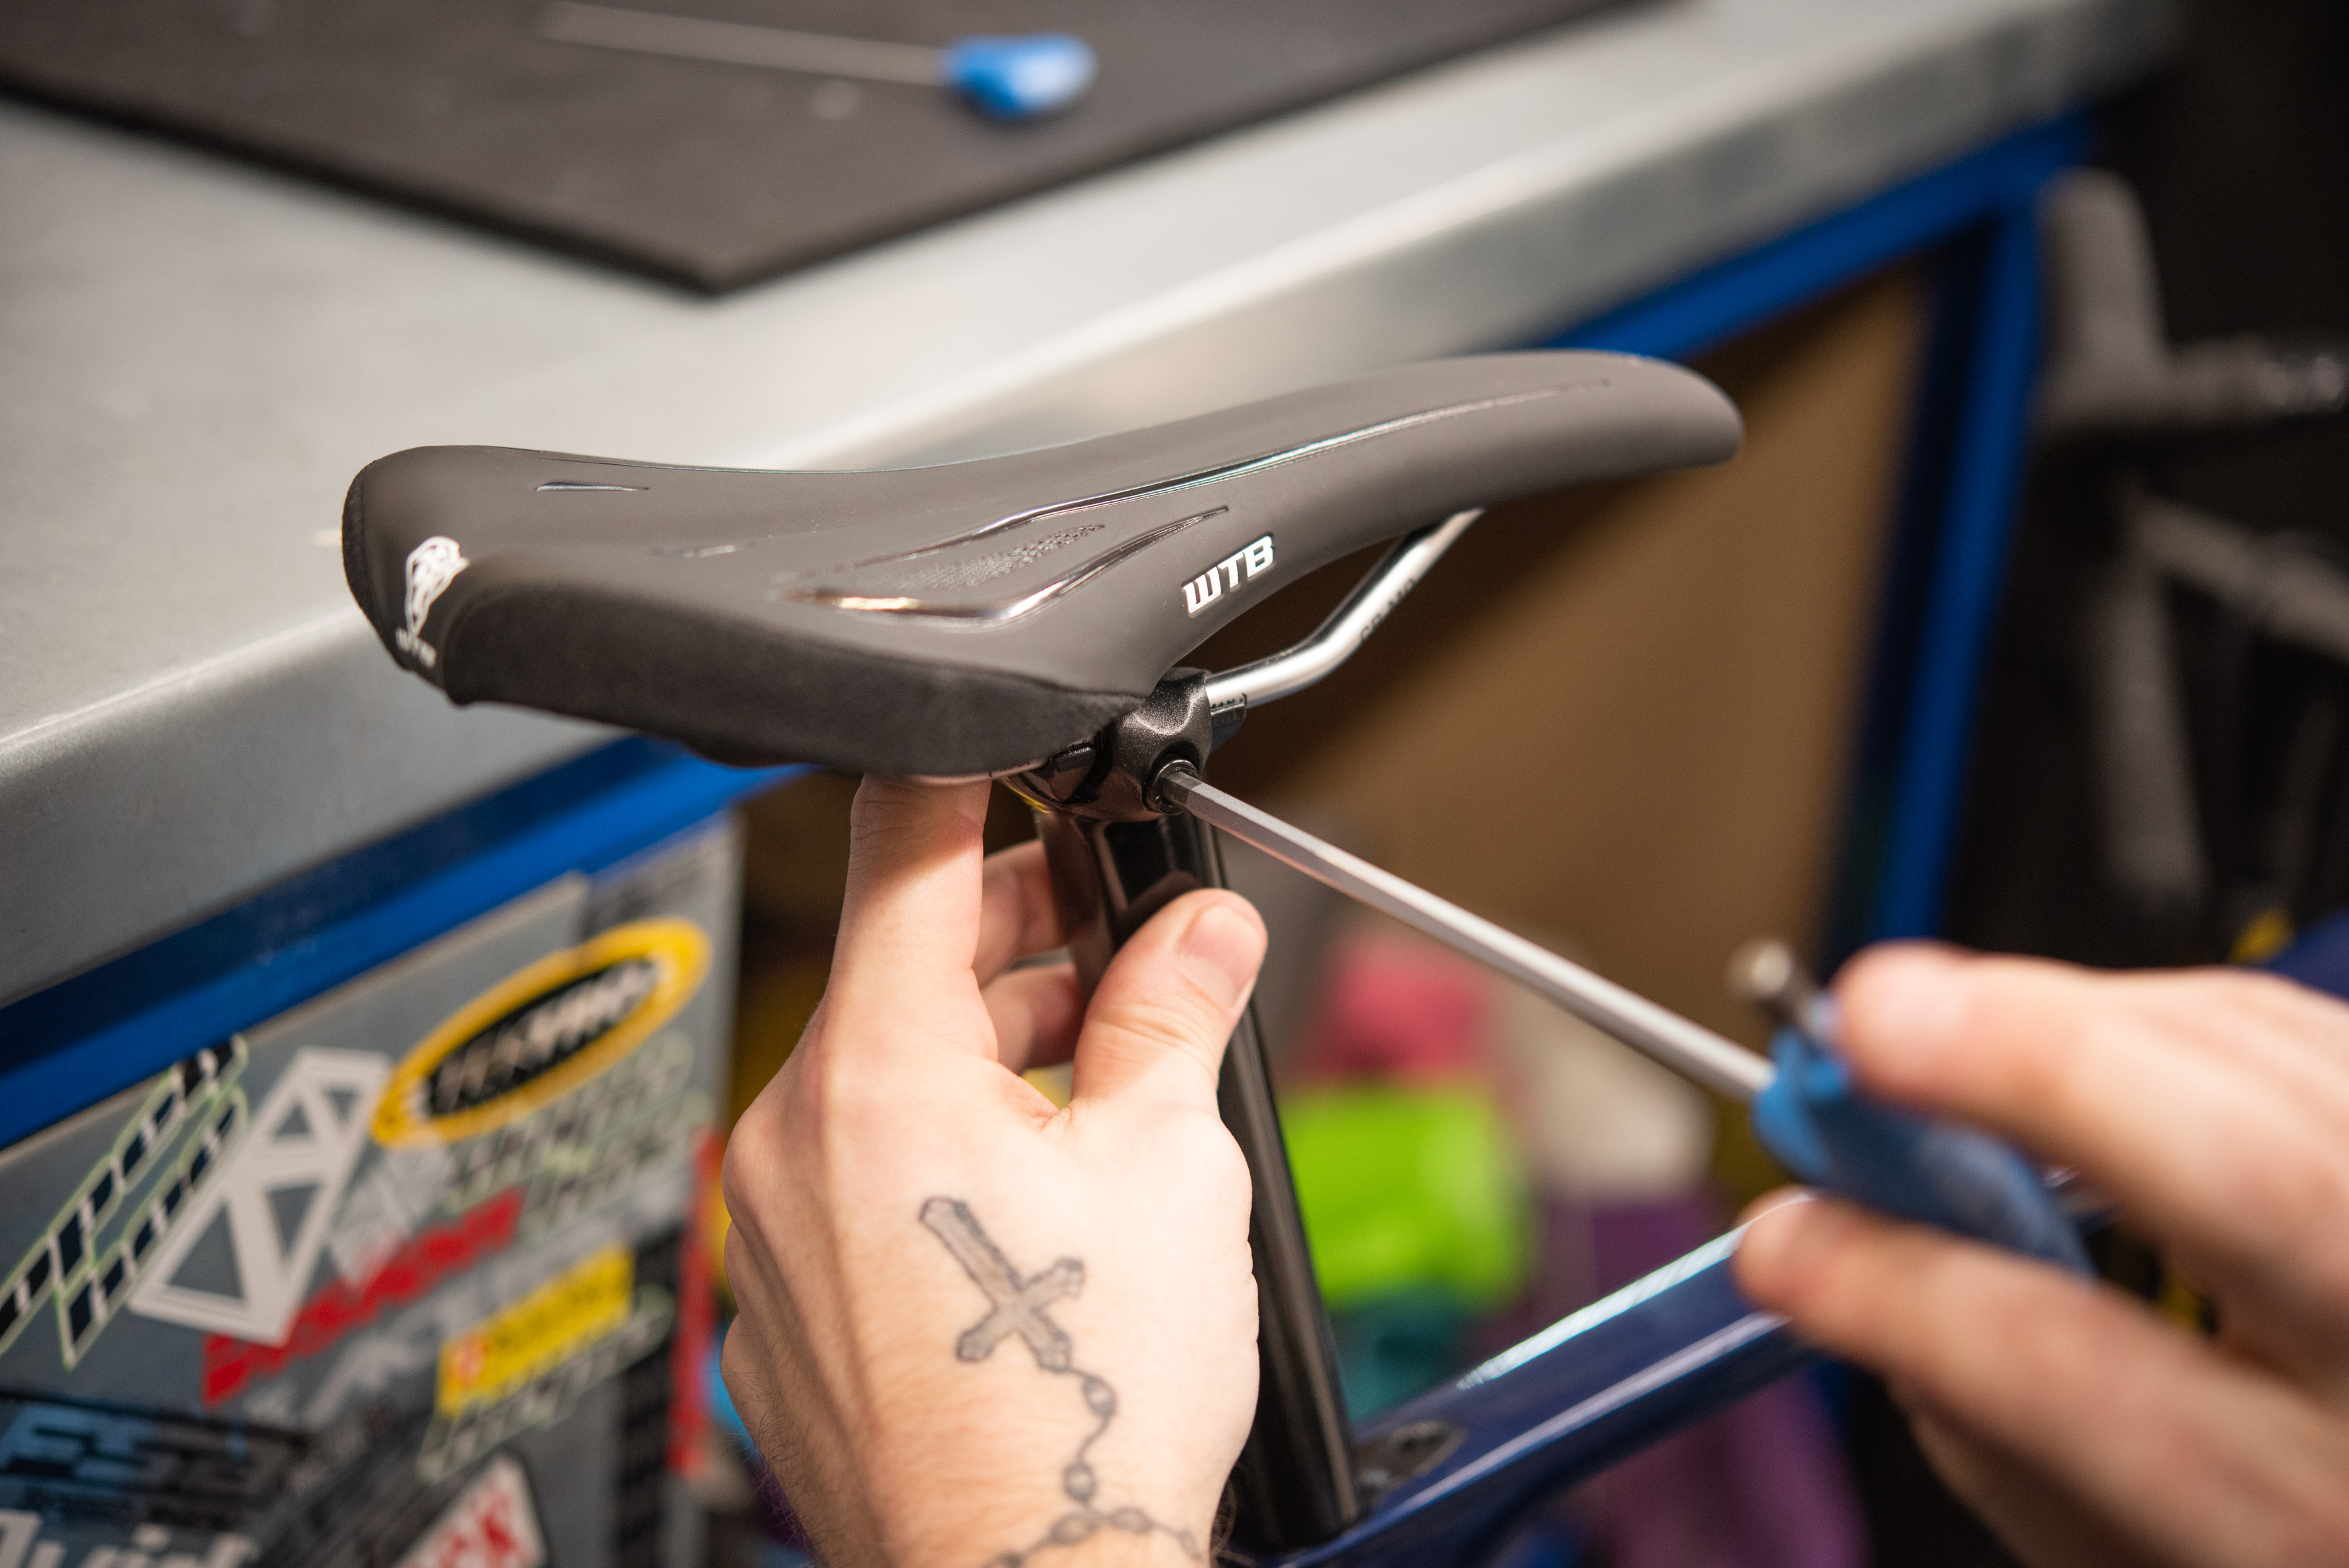
Set the saddle to your preferred position fore and aft and tighten to approx 8-11Nm. If the saddle rails have markings on them take care to stay within these limits. If you exceed these limits it could lead to failure and could potentially void your warranty.
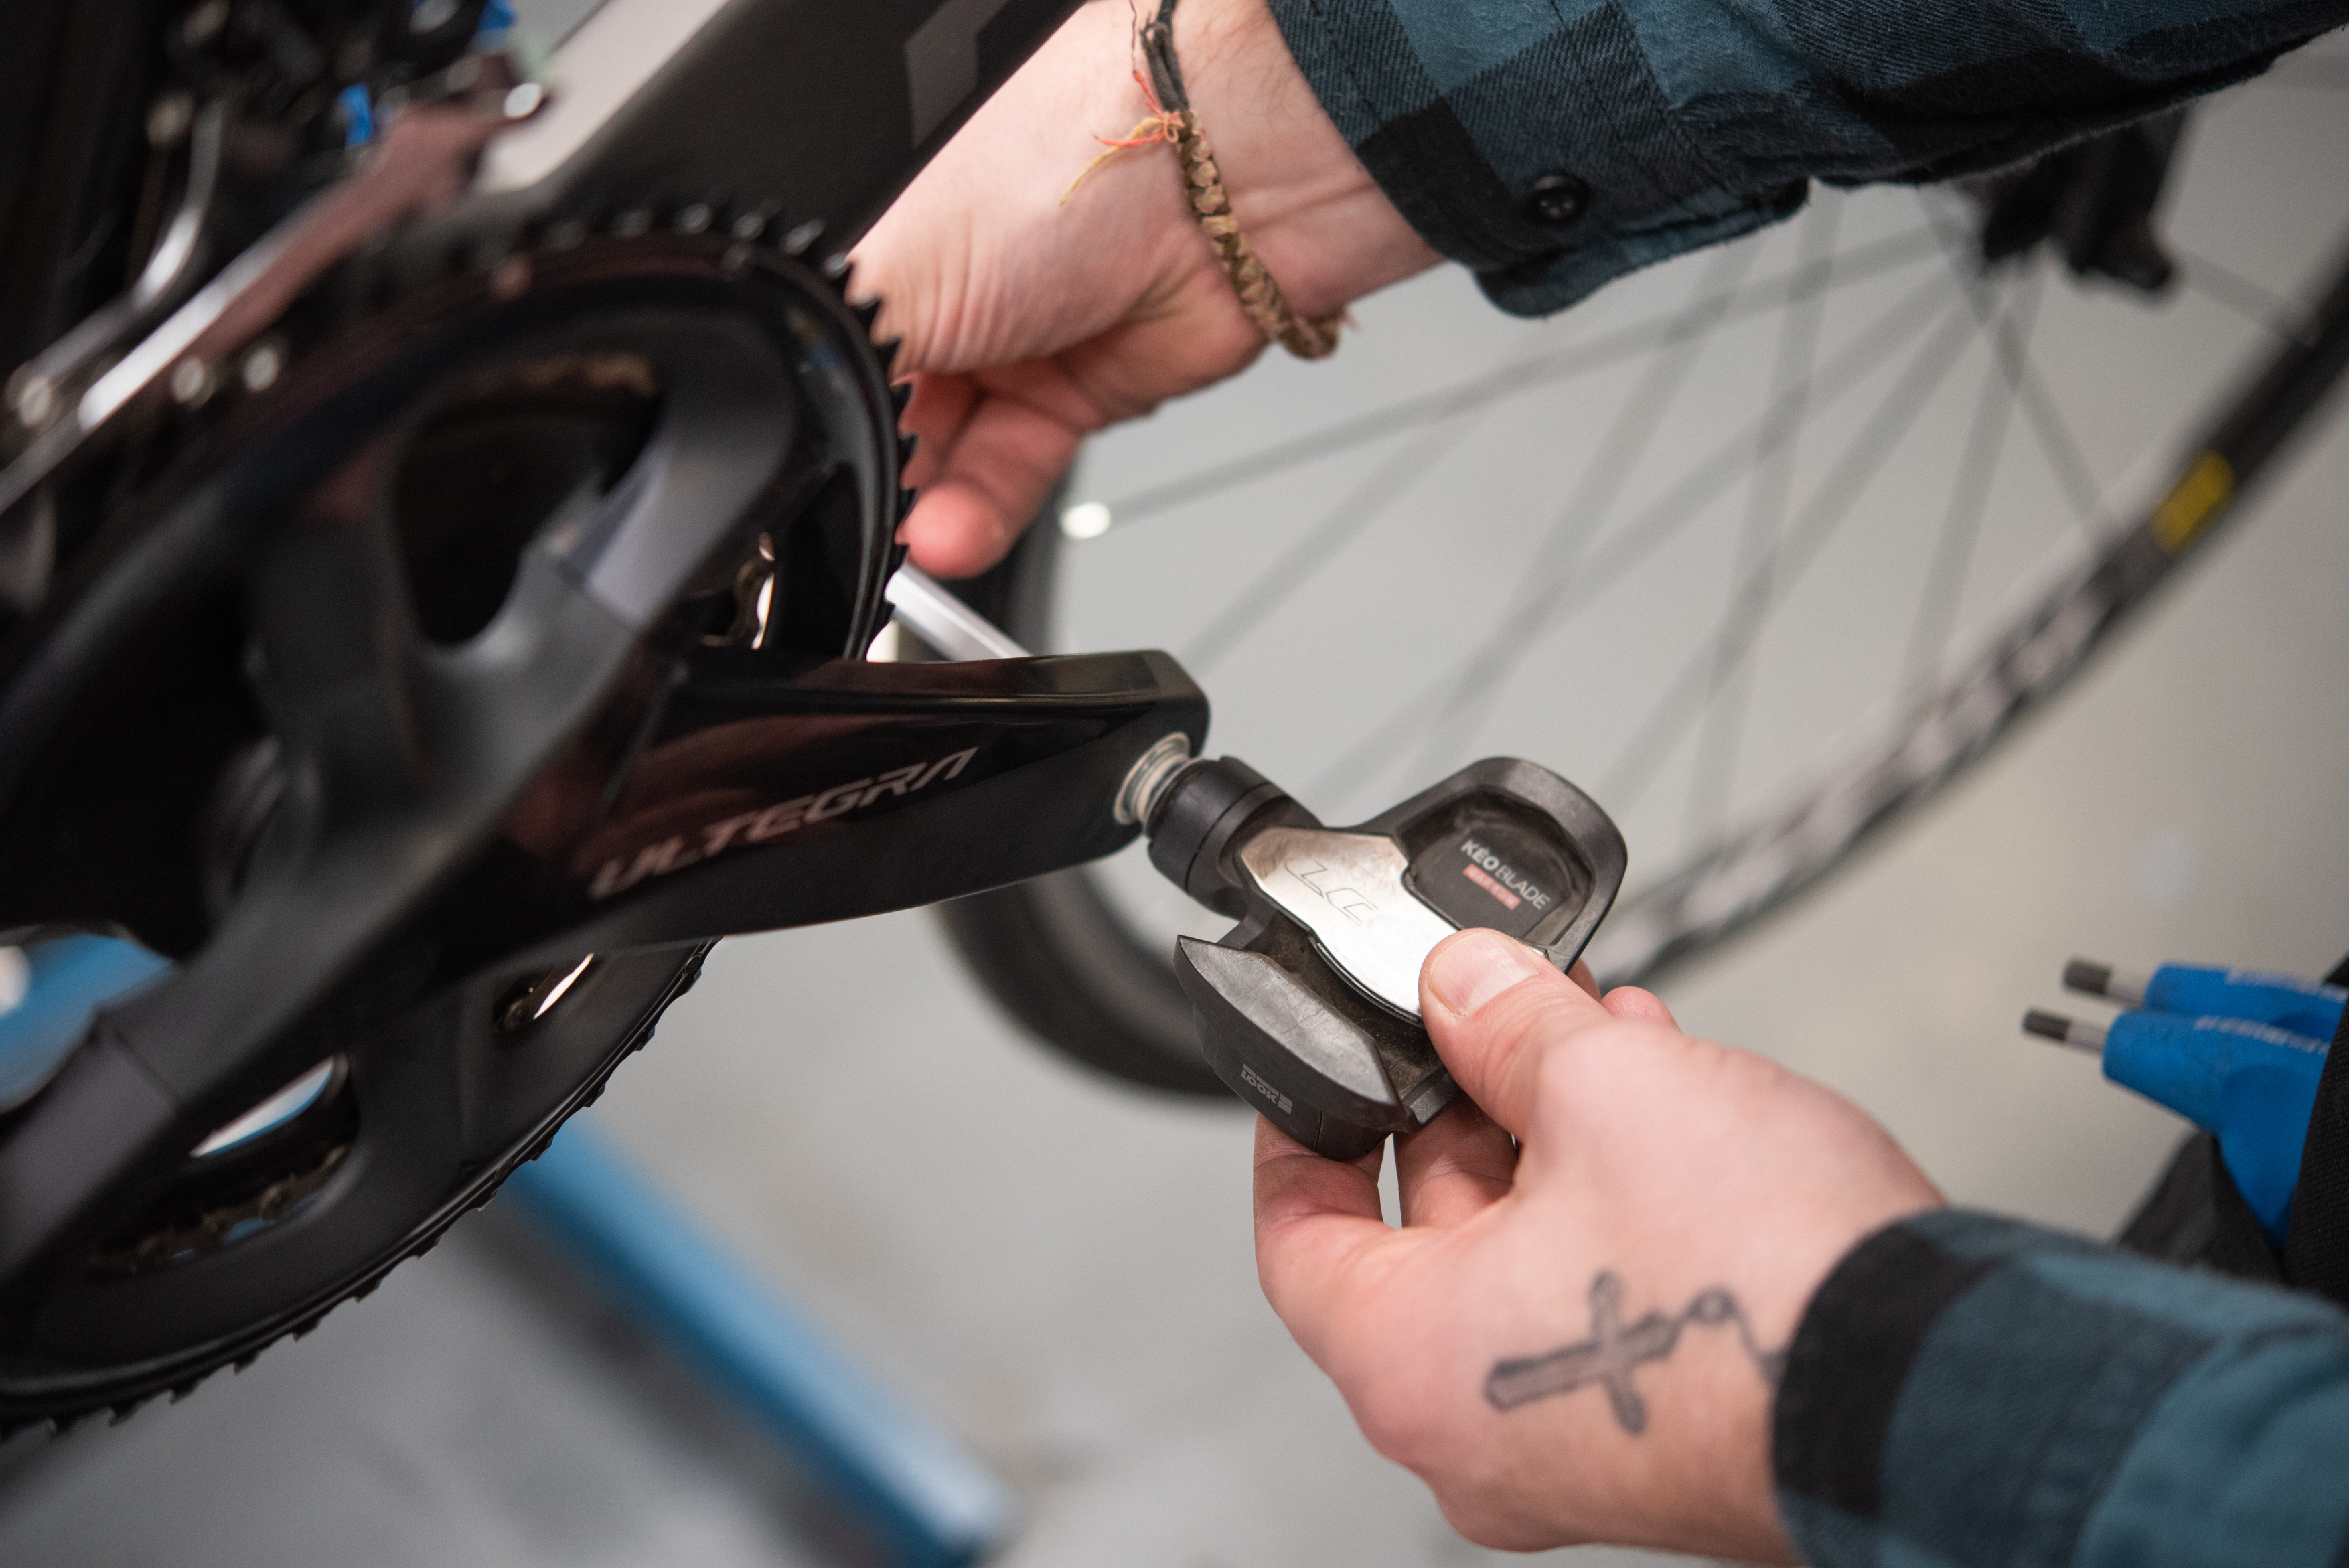
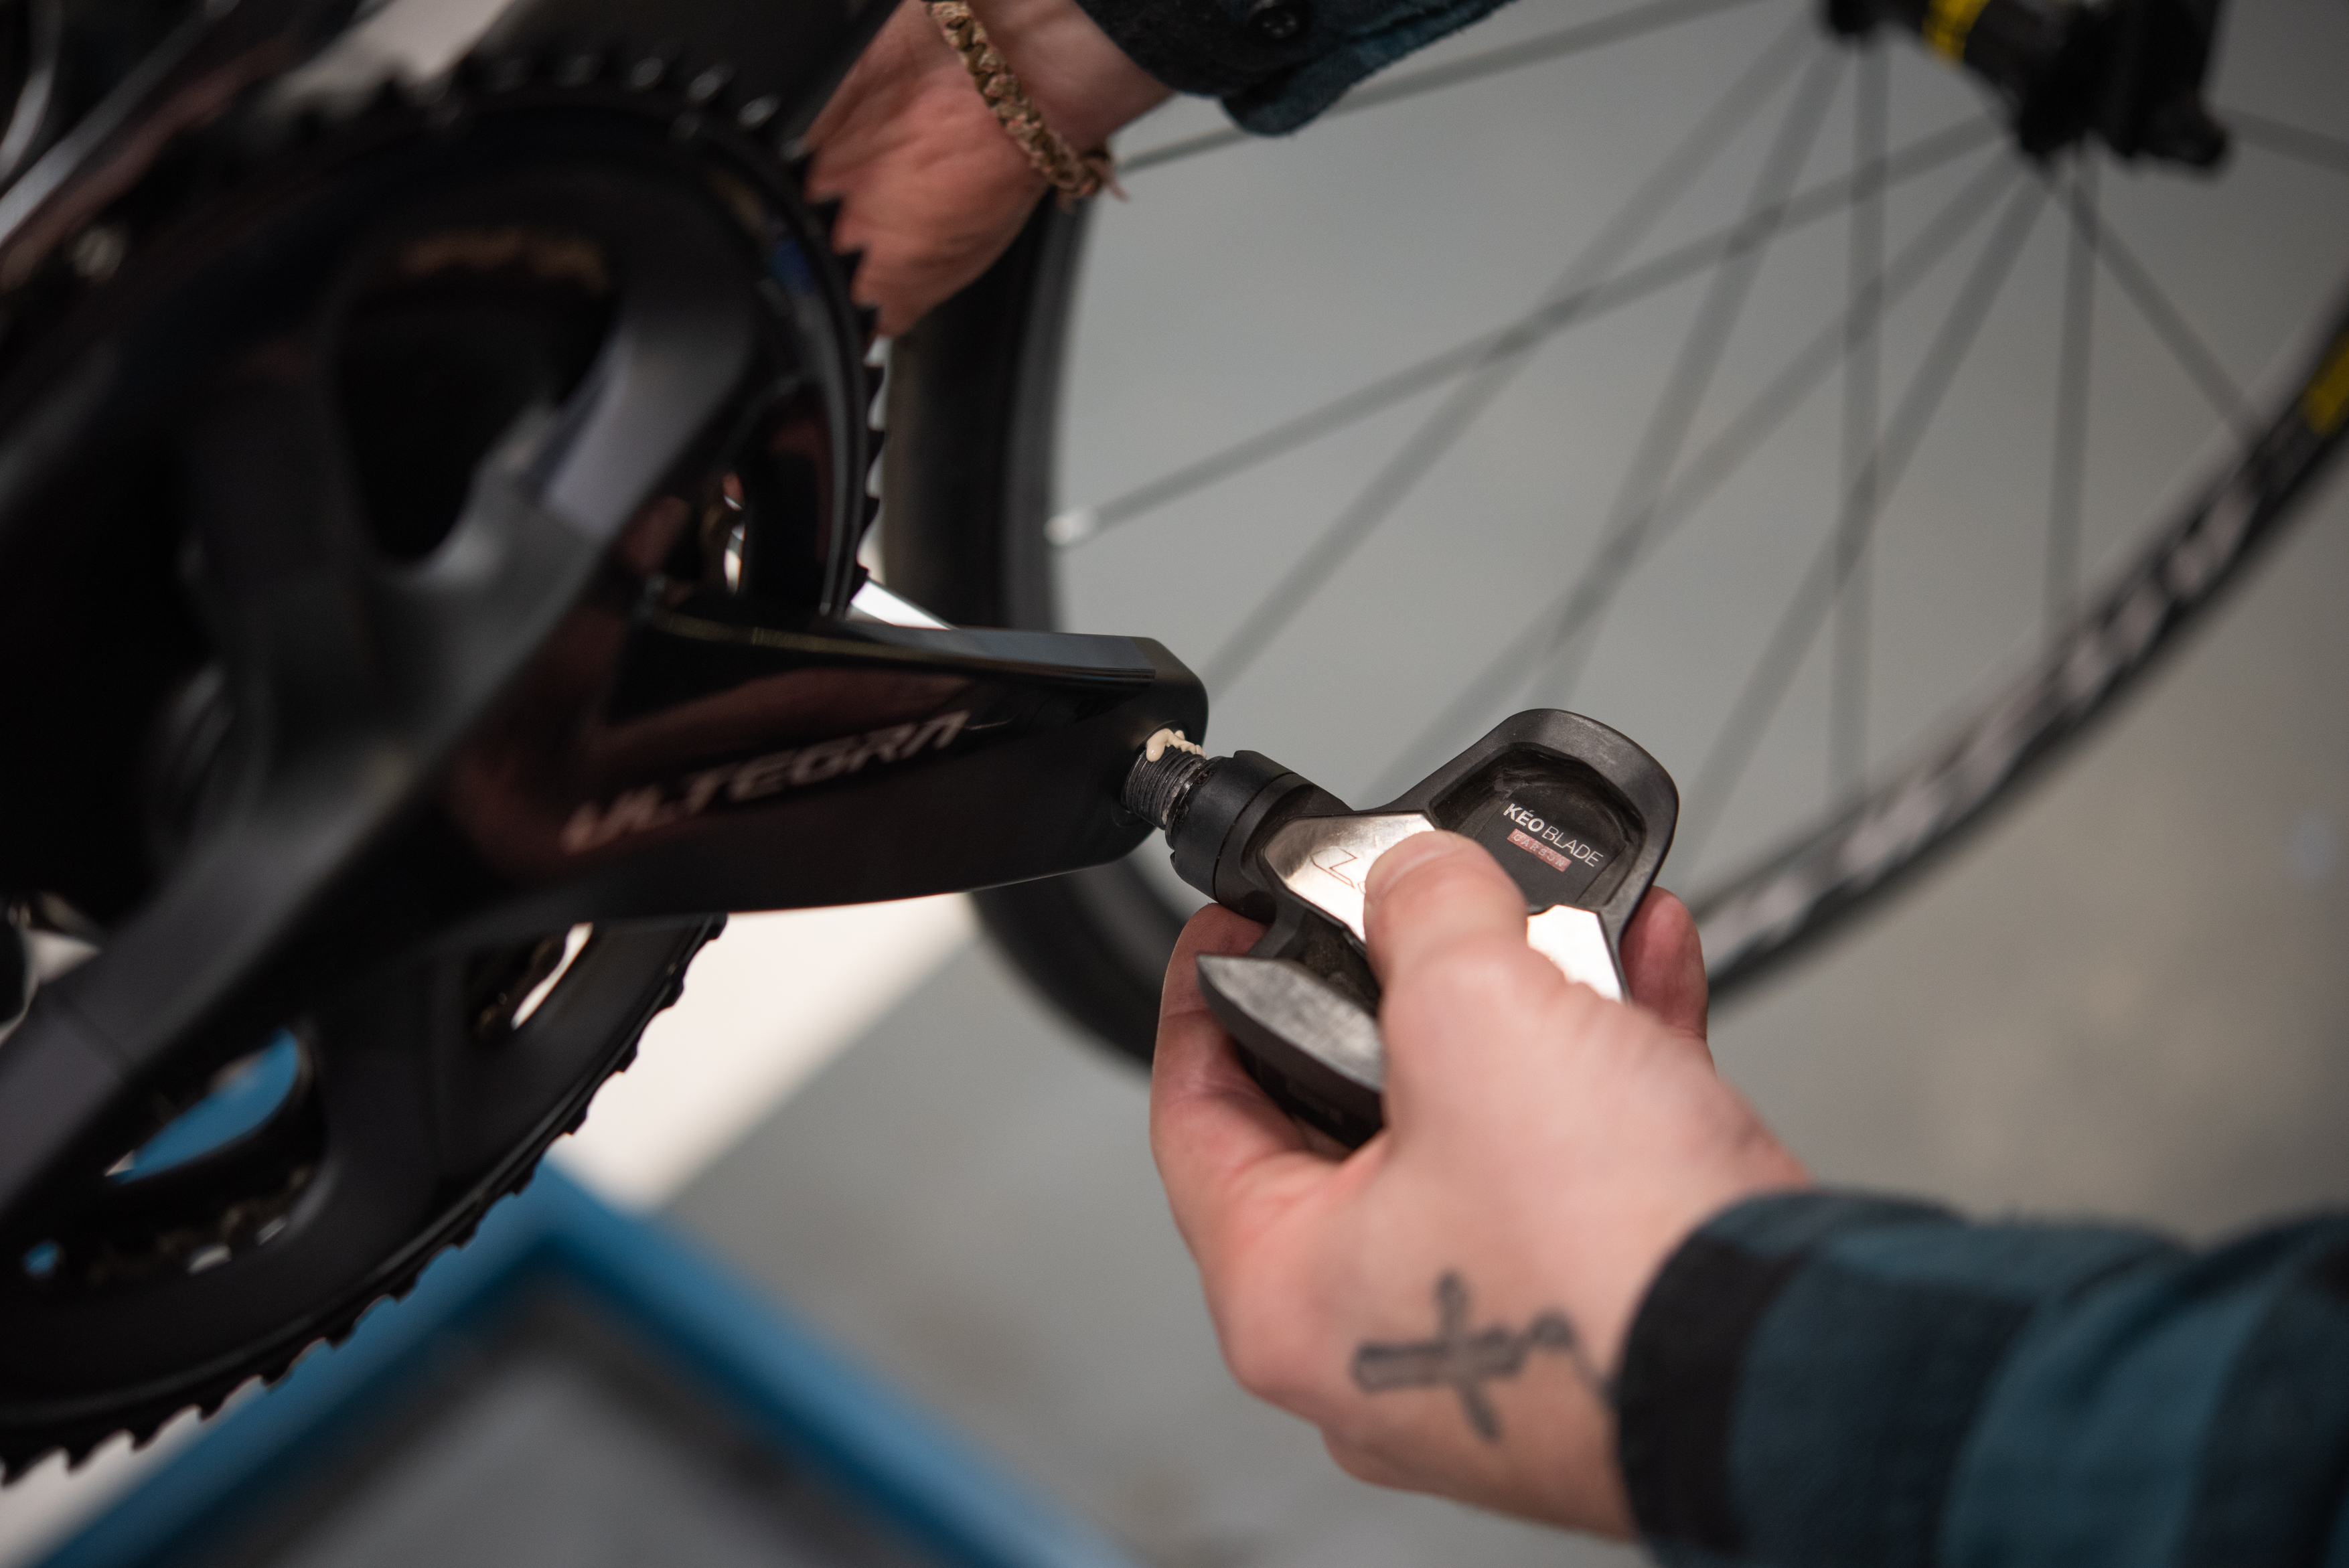
6. Fit your pedals
The threads on the chainset will already have had grease pre-applied by the expert mechanic who built your bike. However, as an added measure we would always recommend using additional grease on the thread of your pedal when fitting them.
Take care when fitting the pedals into the chainset that they are correctly threaded before tightening. Failure to do so could lead to cross threading and this will strip the thread out of the chainset. To tighten the pedals simply tighten using a 6/8mm allen key or 15mm pedal spanner (pedal dependant) towards the front of the bike, clockwise on the drive side (RH) and anti-clockwise on the non-drive side (LH).
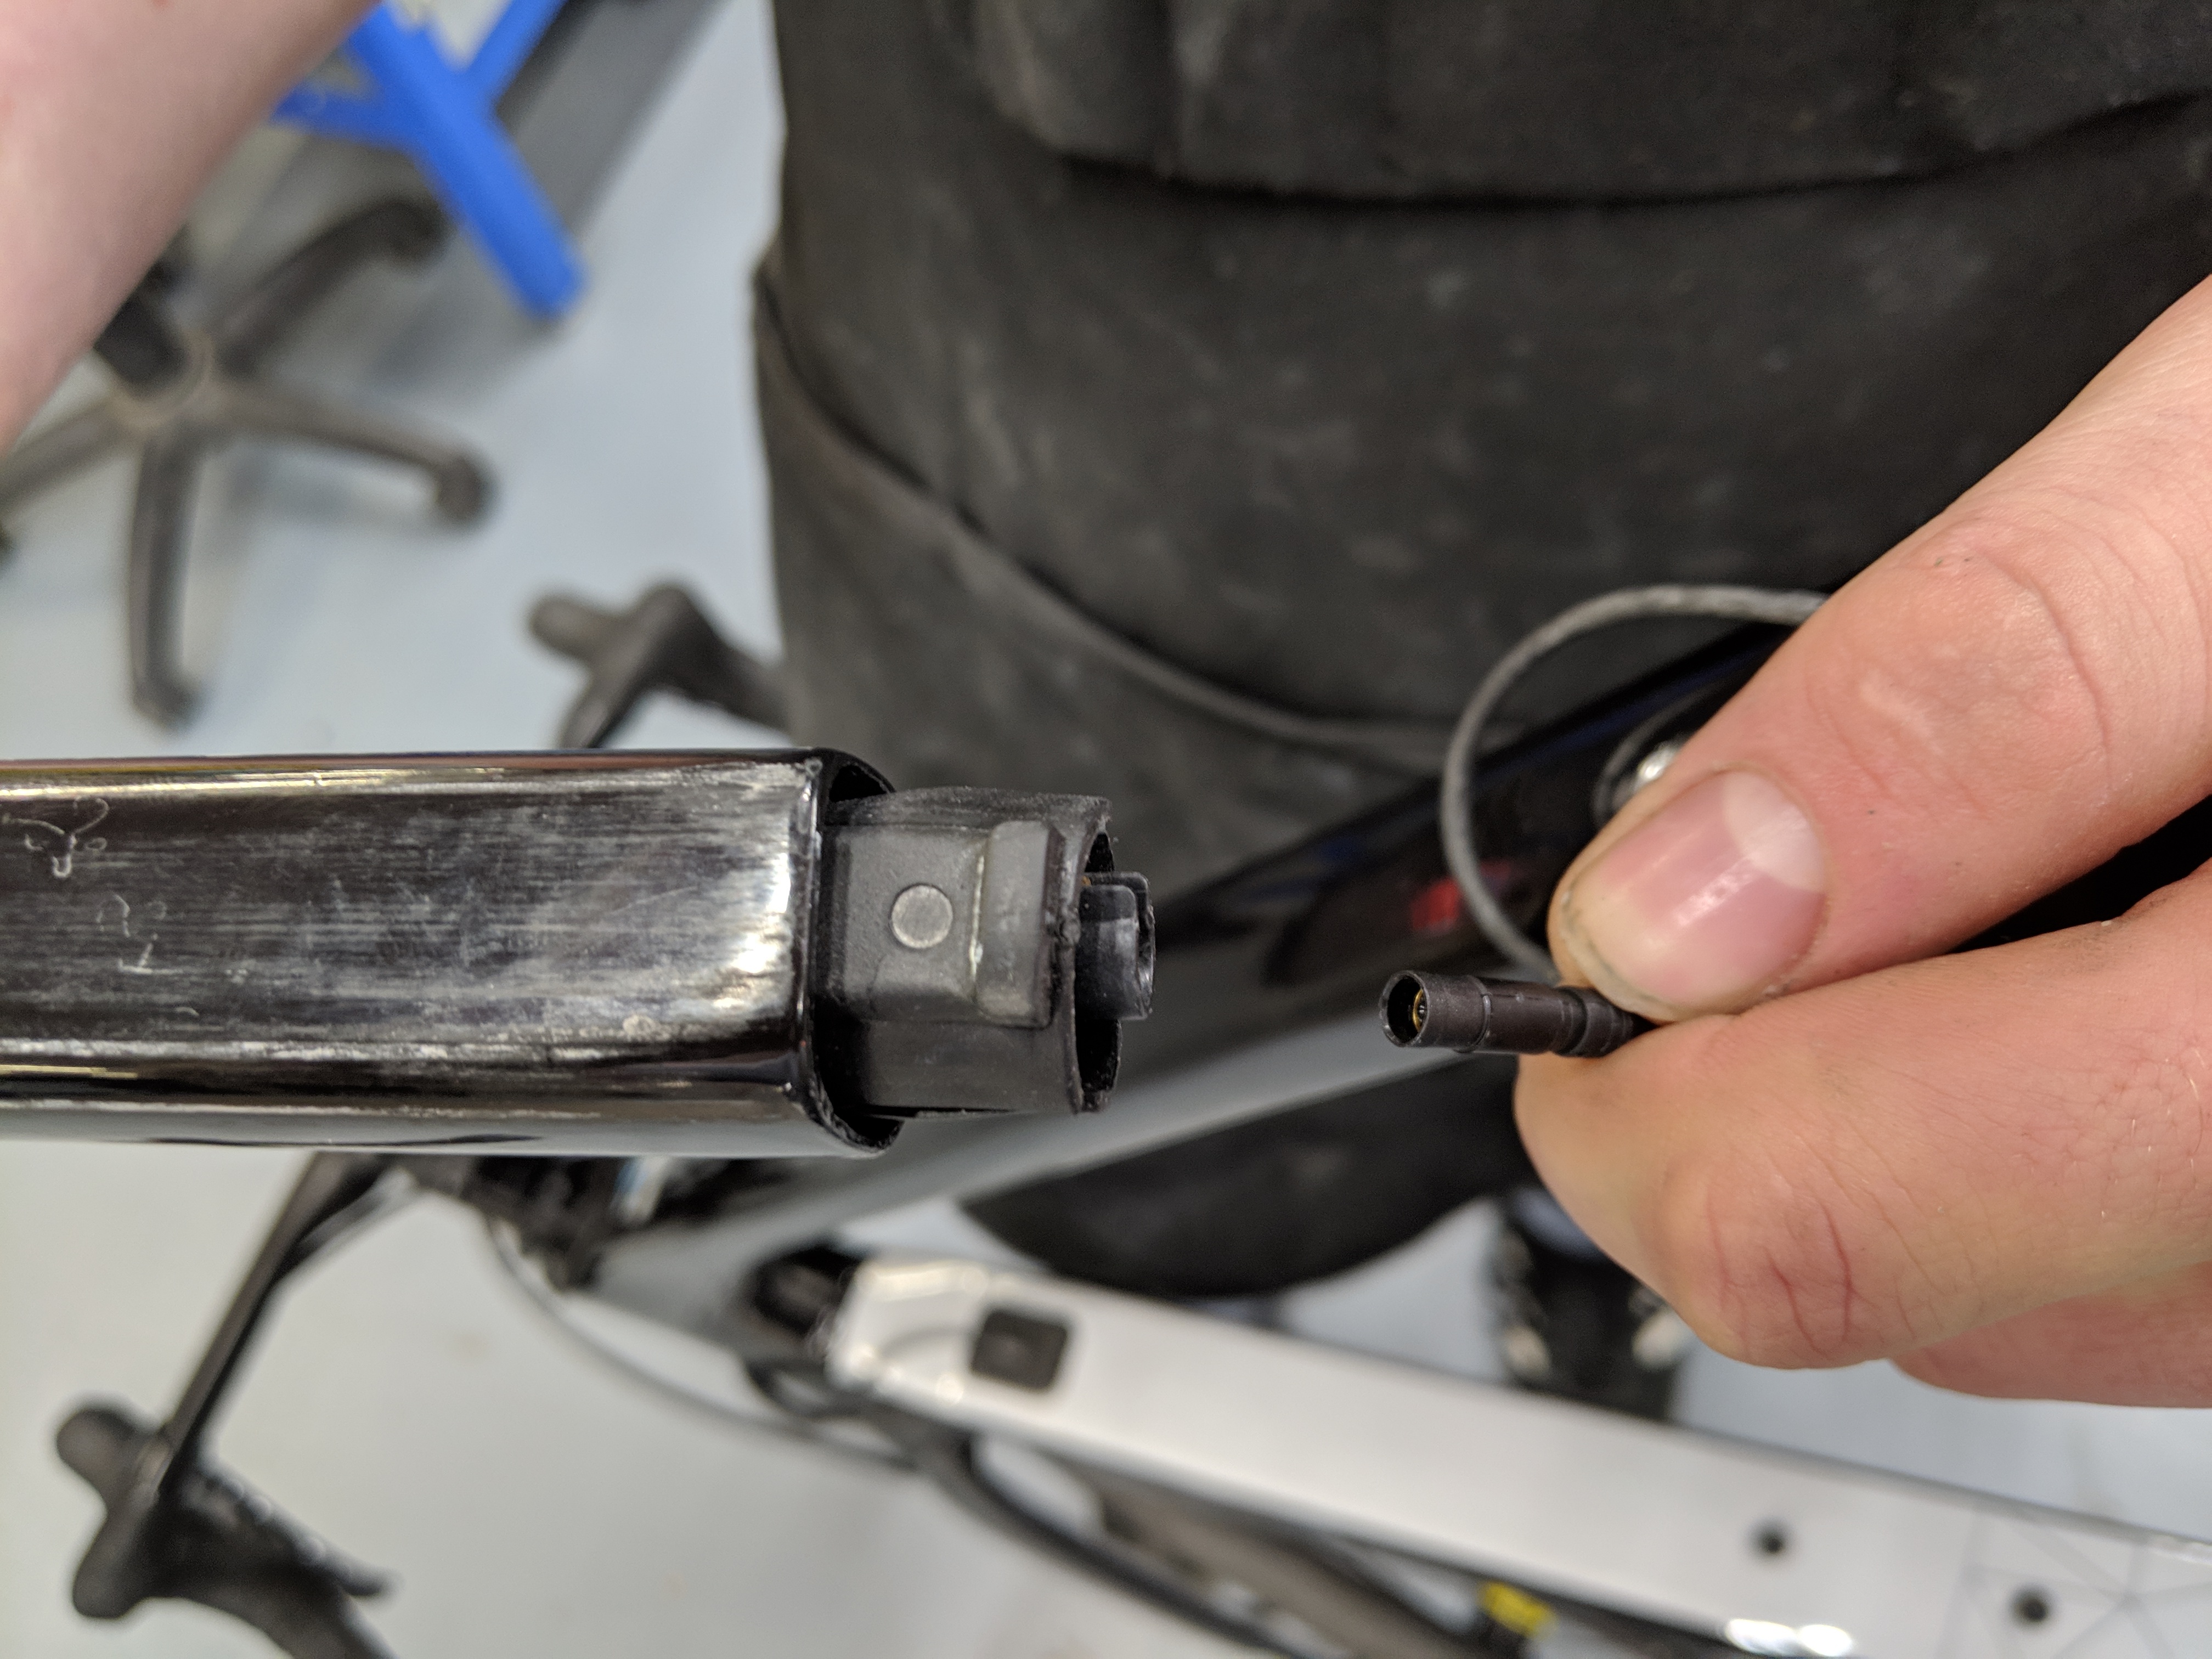
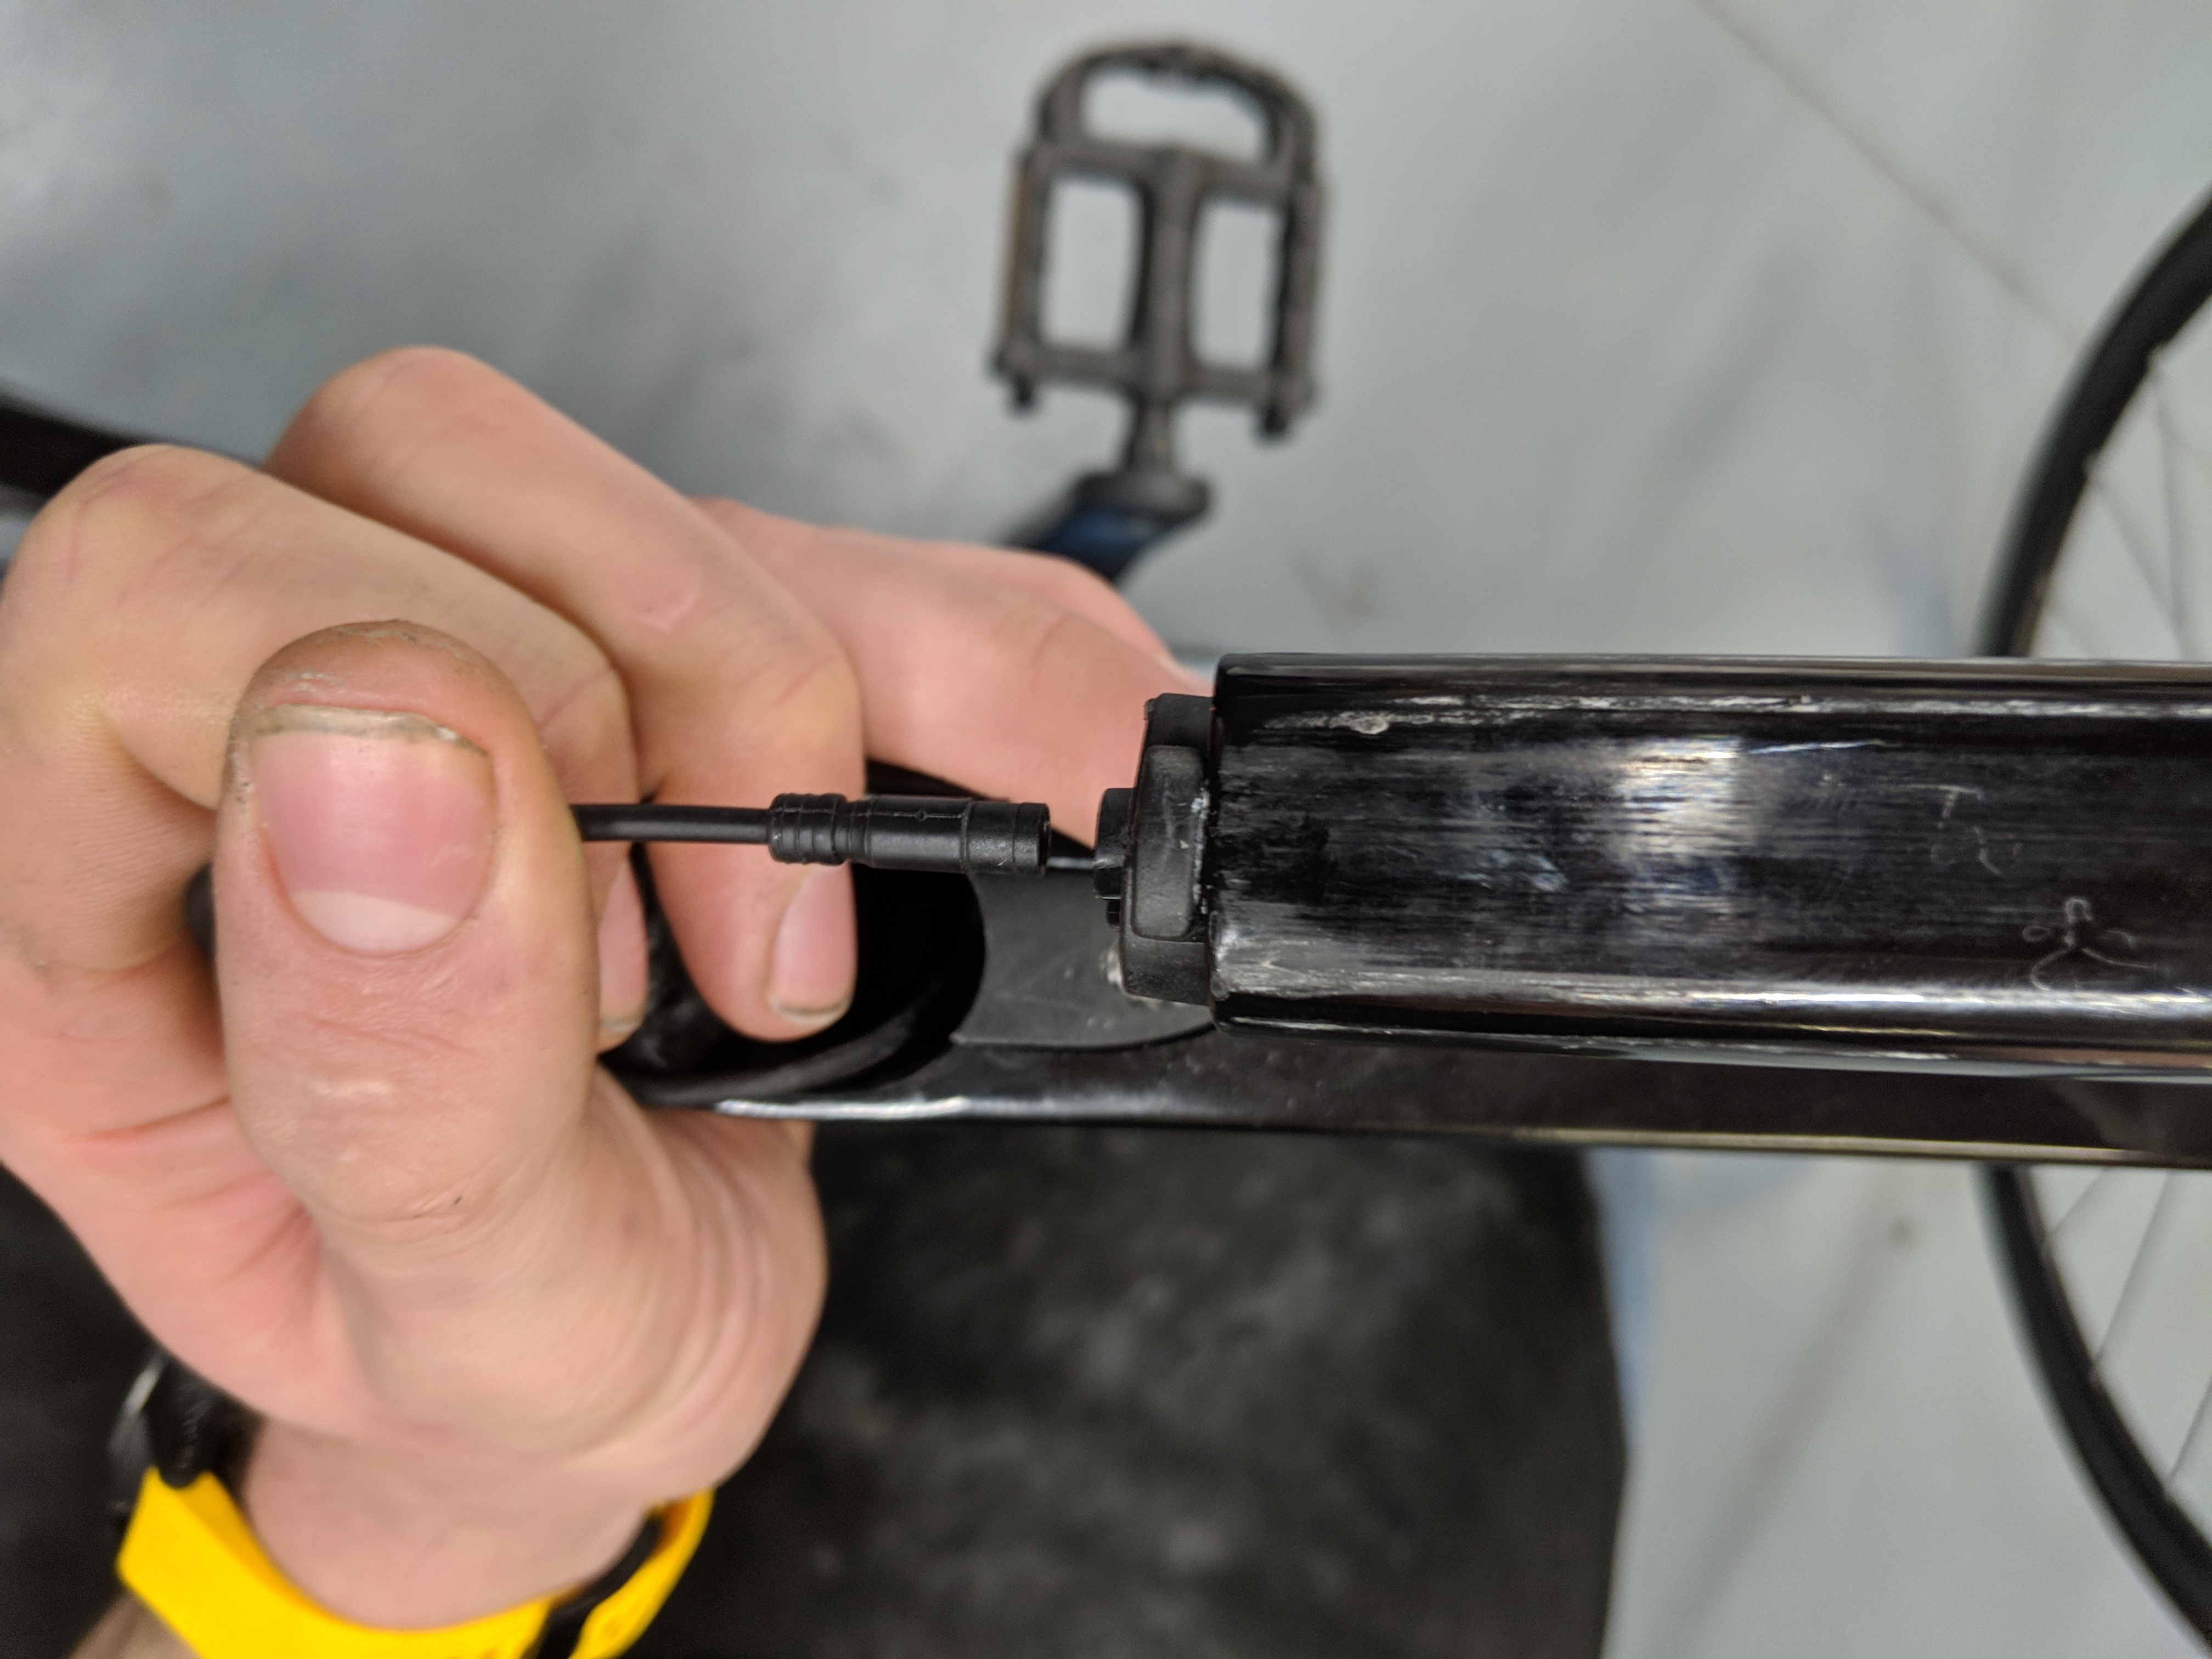
7. Di2 Electronic Gears
Before the bike leaves the workshop the gears are calibrated using Shimano's E-Tube programme and all firmware is updated. If you receive the bike and the gears do not seem to function then check that the cable into the battery is connected securely.
The battery is mounted into the bottom of the seatpost, press the cable firmly into the battery connector until you feel it click into place (see images above). A Di2 plug tool should be included with the bike and this can be used to attach the cables securely. If the cable is attached securely and the gears are still non-functional we recommend plugging the bike into Shimano's E-Tube app and running a connection check. This will tell you if something is amiss.
We would always recommend that you download the E-Tube application so you can periodically check for firmware updates.
8. Before your first ride
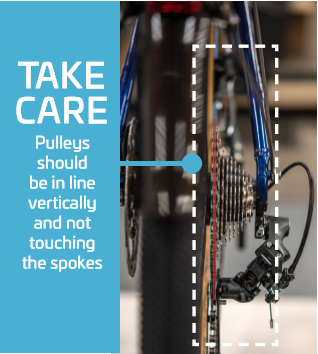
It's rare but despite our best efforts, bikes can take a knock whilst in transit. The most vulnerable and exposed part is the rear derailleur. It is attached to the frame using a replaceable rear mech hanger. If this has received a knock in transit then it may have a noticeable slant towards the spokes .
Check the alignment from behind, the pulley wheels on the rear mech should perfectly align below the sprocket (see image above). If this is not the case then please consult a mechanic before riding the bike. Think you have a problem? Get in touch with us by email at customerservice@ribblecycles.co.uk or by phone on +44 1772 963400.
9. Ribble Recommends
- You should never clamp your carbon bike into a workstand or car rack as this can damage the tubing and potentially void your warranty.
- We do not recommend cleaning the bike with a pressure washer, this will disperse essential grease from the bearings and can force grit/debris in to the bearings. This can cause the premature wear of components.
- When performing routine maintenance remove your seatpost so it does not seize within the frame. Always perform routine maintenance especially after wet or wintry rides.
- In particular keep the chain well lubed and clean, a dirty chain will cause premature wear of the chainrings, gear rollers and cassette. Have your bike booked in with a professional mechanic every 6 months for a routine service. (unless you are able to strip and rebuild bikes of course!).
- When your bike is stored, store the bike in the smallest cog on the rear and i the small ring at the front. This helps to prevent cable stretch and reduces the pressure off the springs in the rear derailleur.
Ribble electric bikes, what do they offer? Find out here.
The Ribble 2019 range, we breakdown each category here.
Endurance SL or CGR SL, the differences explained here
